Yes, they’re Beautiful, Bold, and Brilliant. But who knew that the Bread Baking Babes, whose monthly exploits take them into the far-reaching corners of the global oven, were also Beastly, Brutal, and just plain Bad? That’s the only conclusion I’m left with after undertaking my first bread as a newly-inaugurated Babe. Consider me duly hazed.
Here’s the thing: this bread contains no flour.
When you bake bread with flour, the miller has done a lot of work on your behalf. She has selected the right wheat berries at just the right stage of development, tempered the flour for the proper moisture content, and maybe added malt so the dough will ferment at the right rate. When you bake with no flour, you’re kind of on your own.
Gee, thanks, Babes! Love you too. Do I now have to streak across campus in order to be fully ordained into Babehood?
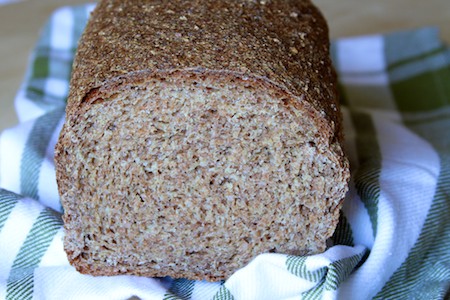
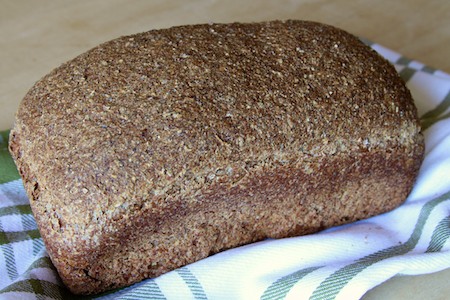
The procedure goes something like this: You don your Birkenstocks. You sprout some wheat berries. You whirl them up in the food processor with some yeast, salt and honey, and work it by hand a little to make a pretty nice dough. You let it rise a few times and bake it in a pan. You get a heavy, dense, gummy-in-the-middle but crumbly-at-the edges, whole-wheat loaf that transports you back some [mumble mumble] years to your college co-op days when everyone wanted to volunteer for weekly bread-baking because it beat toilet-cleaning, but no one really knew how to do it.
But here’s the other thing: it’s really not half-bad, considering the no-flour thing.
Actually, the flavor is pretty great. And I’ve been eating it all week, feeling very virtuous with all this whole-grain healthfulness going into me. I don’t mind dense, because that’s just what you’re going to get with 100% whole wheat. It’s just that I like my loaves to cut without much of the slice left in crumbs on the cutting board and a tenacious residue on the knife.

I will try this again. You should try it too. If you’ve always wanted to be a Bread Baking Buddy, now is the perfect time to start (bwahahaha). The recipe, chosen by Lynn from The Laurel’s Kitchen Bread Book, is below. Given my mixed results with this, my notes may not be too helpful, but anyway:
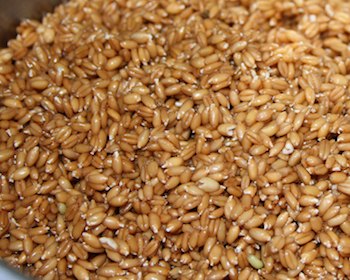
- By sprouted wheat berries, we mean just barely popping their little heads out of their cocoons; if they look like something you’d put on a salad, that’s too far. Mine were sprouted in just under 24 hours.

- I would use a little less honey next time; the flavor is quite sweet.
- I used 3 grams (1 tsp) of instant yeast in place of the active dry yeast called for in the recipe.
- I processed my dough for less time than the recipe called for — about a minute after it came together into a ball. I was worried about over-mixing, but probably a little more would have been a good idea.
- I used a glass pan because it was the only one I had of the right size. I’d look for a metal one next time, or just bake it as a free-form loaf. Make sure you grease the pan liberally — I had sticking issues.
- I removed the bread from the pan after about 50 minutes of baking and returned it to the oven. I used a probe thermometer and called the bread done when the internal temperature reached 205F, which was about 15 minutes after de-panning.

I want to thank the Babes for inviting me to join them, and I’m sorry I’ve been so crabby my first time out. They are truly an awesome bunch:
Bake My Day – Karen
blog from OUR kitchen – Elizabeth
Canela and Comino – Gretchen (Babe on Hiatus)
Cookie Baker Lynn – Lynn
Feeding my enthusiasms – Pat
Grain Doe – Gorel
I Like To Cook – Sara
Living in the Kitchen with Puppies – Natashya
Living on bread and water – Monique (Babe on Hiatus)
Lucullian Delights – Ilva
My Kitchen In Half Cups – Tanna
Notitie Van Lien – Lien
Paulchens Foodblog – Astrid
The Sour Dough – Breadchick Mary
Thyme For Cooking – Katie (Babe on Hiatus)
––––
Yeasted Sprouted Wheat Bread
(from The Laurel’s Kitchen Bread Book)
makes 1 loaf
3 cups hard spring wheat berries (1-1/4 lb or 575 g), about 6 cups sprouted
1 tsp active dry yeast (1/8 oz or 3.5 g)
2 Tbsp warm water (30 ml)
2 tsp salt (11 g)
3 scant Tbsp honey (40 ml)
To sprout the wheat:
Rinse the grain and cover with tepid water, letting it stand 12 to 18 hours at room temperature. Allow the longer period in cooler weather, the shorter period in warm.
Drain off the liquid, rinse the grain with fresh, tepid water, and store in a dark place with a damp cloth over the top of the container. Rinse at least every 12 hours, just until the tiny sprout is barely beginning to show and the grain itself is tender – about 48 hours, then refrigerate until they are cool, overnight or longer, but not more than a day or two.
To make the loaf:
Dissolve the yeast in the warm water.
Put the regular cutting blade into a standard-size food processor and measure just over 2 cups of the sprouted wheat, a third of the total, into the bowl. Pour about 2 tsp of the dissolved yeast liquid, a scant Tbsp of honey, and about 2/3 tsp of salt over the wheat in the bowl. To protect the yeast, use separate measuring spoons for each of the ingredients.
Process until the ground wheat forms a ball, about one minute. Scrape the sides of the bowl, and process about two more minutes. Stop processing before the ball completely falls apart; if your wheat is not exceptionally high in protein a minute and a half might be all it can handle. If it falls apart, check the time, and with the next two batches, stop a little sooner.
Repeat with the remaining two-thirds of the ingredients, in two batches. Knead the three dough balls together.
Form the dough into a ball and place it smooth side up in the bowl. Cover and keep in a warm draft-free place. After about an hour and a half, gently poke the center of the dough about 1/2 inch deep with your wet finger. If the hole doesn’t fill in at all or if the dough sighs, it is ready for the next step.
Press flat, form into a smooth round, and let the dough rise once more as before. If the dough is cold, the first rise will be fairly slow, but as the dough warms up, the rising will telescope.
Gently knead into a round. Use water on your hands to prevent sticking, and keep the ball as smooth as possible. Let it rest until it regains its suppleness while you grease a standard 8 x 4-inch loaf pan, pie tin, or a cookie sheet.
Deflate the dough and shape into a loaf. Place the dough into the greased loaf pan and let rise in a warm, draft-free place until the dough slowly returns a gently made fingerprint. Bake about an hour at 350 deg. F, though if your bread rises very high, it will take less than that.
Now that you mention it…. I think streaking in Birkenstocks is just the thing to top it all off.
You made it through with bells on – a true Babe!
This is such a funny post,We’re so glad you joined our little group, I think you made a wonderful bread, considering the recipe! You passed with flying colors!!
I think your bread looks good for your first try. I made this one a couple of months ago and my first attempt turned out like a gummy brick because I sprouted the wheat berries a little bit too long. My second attempt worked much better.
The loaf looks great! So glad you have joined the Babes.
And that’s a yes for the streaking (in the Birkenstocks) – just let me charge my camera batteries first…
Streaking across campus?? Bite your tongue, Susan!
I too am completely amazed at how really very good this bread is. And mine wasn’t even baked through properly. I’ve been absolutely loving it for lunch. It makes the most wonderful toast. And it’s great with melted cheese. (If only I had some cream cheese, smoked salmon and capers….)
I am intrigued 🙂
She (the one from Wild Yeast) graciously forgets to mention that she managed a Dome! Like in real bread! It’s a good thing she looks so striking/streaking in Birkenstocks. Totally back in vogue by the way!
Great write-up and really goodlooking bread, considering.
Can you make them sourdough???
You complain, but your bread still came out perfect. It looks like an uncut loaf of Alavarado street bakery bread. (My favorite for sandwiches, btw).
Susan your bread looks great and is at least edible. It does take me back to when my hair was much longer and had no gray in it 🙂 With some of your tips I plan to try again. Glad we are newbie Babes together. I’ll let you do the streaking, OK?
Duly hazed indeed! and you’re streaking in Birkenstocks too. I consider us ALL duly hazed with or without Birkenstocks with this bread.
Karen’s right, a real dome, that pretty much takes this one to lofty levels.
Interesting how a bread that doesn’t turn out nearly as well as what we aim for shows us enough promise we want to get it right and are willing to try sprouts again.
We’re pleased as punch (as in wine) to have you join us!
You know, Susan…. every single bread I see you make, makes me want to go to the kitchen and get started….
I am a bit shocked by this one… but I have to say that your write up is so engaging, that I “almost” feel like making it 🙂
You ARE brave!
This is a keeper recipe. I am bookmarking it right away.
Nice posting!
thanks for sharing.
Sprouted bread, that is interesting… some studies claim that sprouted wheat is a lot healthier than plain wheat, though I’ve tried this bread and it’s so very different…
I will try it,sounds good,healthy and funny.
Yummm…this looks delicious! I am going to try it–even though I haven’t baked bread in years. Thanks for your conversational description (and photos) of the whole process–it makes it seem more do-able.
I love this kind of bread. Many German breads are made without flour. But not with 100% sprouted grain berries. I have to try this, it sounds fantastic!
Here we usually leave these breads on the counter for one or two days before slicing them. That makes the texture much better. There’s a saying that these wholesome breads are “too fresh” on the baking day. And Maybe baking this kind of bread at a higher temperature also helps with the stickyness. I made a similar bread awhile ago and started with 480°F, reducing to 400°F after 10 minutes.
My goodness! I’m in awe! You’re loaf looks absolutely perfect, as opposed to mine. I was going to give up on this entirely, but when you’re saying that you are going to make this again, I became stronger at once. Yes! The taste is really remarkably good, now I only have too make a decent loaf out of it, a loaf that you can cut with a knife.
you’re a hoot! ironically, i AM wearing Birkenstocks, and i DO have some wheat berries that need using. guess what i’ll be baking? it looks delicious.
WOW! Look at that wonderful bread!!
You truly deserve to be called a Babe!
What a great choice for a new babe! And you pulled it off with flying colors. Pretty cool for a loaf with aspirations for construction work… I wish my first attempt had looked that light and normal.
Who’s Erkin Bekbolotov again?
Looks like a good recipe. I’ll have to try it out sometime. You should check out Liscio’s blog- they have a ton of great bread-oriented recipes! http://lisciosbakery.com/blog
Can someone please explain to me why flour type bread is undesirable? I’ve been reading that it is not as healthy as we all have thought but no one has explained why?
Great recipe, i would like to take it one step further and use a sough dough stater instead of the yeast.
I have recently mastered the famous San Fransisco
sough dough, i will try this recipe using that instead of yeast and post my results.
Thanks for posting this !!
will you try a sprouted flour recipe too?
This looks awesome. I’m going to try it!
Amazing!It blows my mind! No flour, perfect texture, great taste! Thanks to share!
Amazing! No flour! This blows my mind! Perfect bread, great texture, good taste! Thank you so much to share! Merci!
If I were to make this with a normal wild sourdough starter (not dried, how much would I use? I would guess maybe 1/2 cup but I don’t want to waist any preciously sprouted wheat berries!