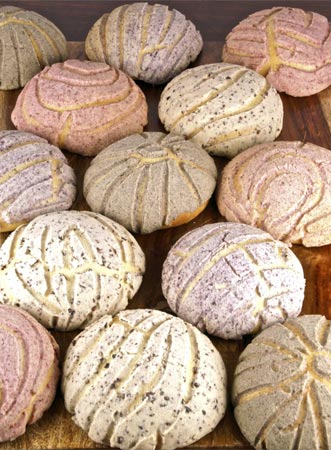
Walk into any Mexican panadería, and there are plenty of them around here, and I guarantee your eye will be caught by a colorful array of conchas. This sweet roll, whose name derives from its sugar-paste topping scored to resemble a shell, is the most visually fun, and maybe the best-known, pan dulce of all.
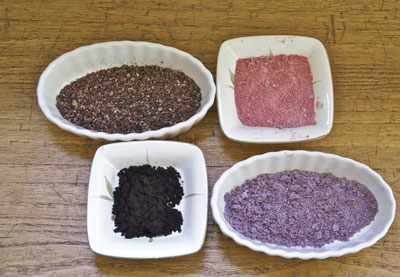
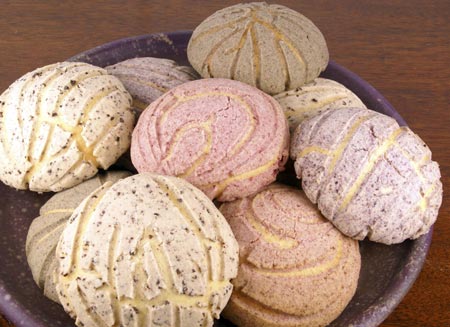
You might notice that the colors of my conchas are more muted than those you often see. Not being a big fan of food coloring, I experimented with more natural ways of coloring the topping. I used (clockwise from upper left) coarsely ground cacao nibs, dehydrated raspberries and blueberries (finely ground in a spice mill along with a bit of granulated sugar to keep them from clumping), and acai berry powder:
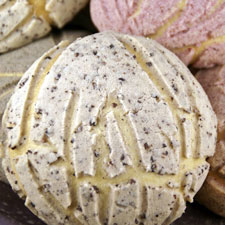
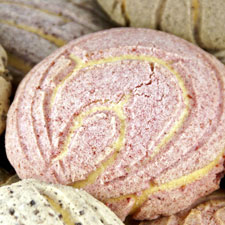
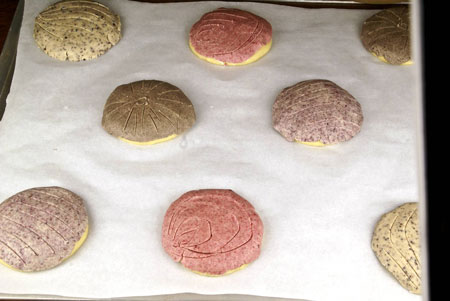
This is how the corresponding finished conchas looked:
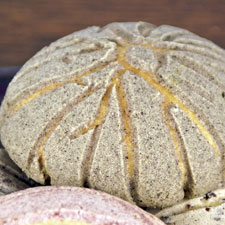
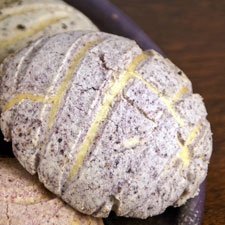
I adapted a recipe in The Art of Mexican Cooking by Diana Kennedy, with a few modifications in addition to the colors. I had to guess at the amount of yeast in the final dough, since the recipe didn’t list any. I knew that must be an error, since the amount of yeast in the sponge alone is surely not enough to raise such a sweet dough. I also increased the amount of butter in the topping, which I needed to get it to hold together as a paste. I used the mixing method specified in the recipe, in which the bulk of the sugar is added from the beginning, but if I make these again I’ll add the sugar more gradually to allow for better gluten development.
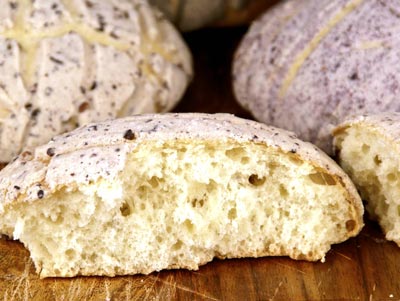
All in all, though, I’m happy with my first crop of conchas, which I’m delighted to send to Gretchen Noelle (Canela y Comino) and Zorra (1x umrühren bitte), for Bread Baking Day #27, Latin Breads.
Conchas
Yield: 16 rolls
Time:
- Mix and ferment sponge: 2 hours
- Mix final dough: 10 minutes
- First fermentation : 30 minutes, then 8 – 16 hours in the refrigerator
- Divide and shape: 20 minutes
- Proof: 3 hours
- Bake: 20 minutes
Sponge Ingredients:
- 113 g flour
- 3 g instant yeast
- 1 T. warm water
- 50 g (one large) egg, lightly beaten
Final Dough Ingredients:
- 450 g flour
- 180 g sugar
- 3 g (1/2 t. salt)
- 45 g unsalted butter, softened
- 220 g egg
- 57 g warm water
- 7 g instant yeast
- all of the sponge
Topping Ingredients:
- 114 g all-purpose flour
- 114 g powdered sugar
- 91 g unsalted butter, at room temperature
- Colors/flavors as desired. The original recipe specifies, 2 T. cocoa powder for half, and 1 T. cinnamon for the other half. I divided the dough in quarters and used 1 T. coarsely ground cacao nibs, 3 g dehydrated raspberries, 3 g dehydrated blueberries (both berries finely ground in a spice mill with a bit of granulated sugar), and 1.5 t. acai powder.
Method:
- In a medium, combine the sponge ingredients and mix until well incorporated. Cover and ferment until double in bulk, about 1.5 hours.
- In the bowl of a stand mixer with a dough hook, combine all of the final dough ingredients except 60 g of the sugar. Mix on medium-high speed (I used Kitchen Aid mixer speed 5) for 5 minutes.
- Add the remaining sugar and continue to mix for another 3 minutes, until the dough more or less holds together around the dough hook. It should be soft and sticky and shiny.
- Using a little flour around the sides of the bowl to help loosen the dough, turn the dough into a lightly buttered container. Cover and ferment in a warm place for 30 minutes, then place in the refrigerator overnight (8 – 16 hours).
- Before removing the dough from the refrigerator, prepare the topping. Sift flour and powdered sugar together, then cut the butter into the mixture and work it together into a paste with your fingers. Divide the paste and add the colorings.
- Turn the main dough into a lightly floured counter. Divide it into 16 pieces of approximately 60 grams each.
- Shape each piece into a ball by cupping your hand over it loosely and rolling it around on the counter. Place the balls on two large parchment-lined baking sheets.
- Divide the topping paste into 16 balls. Press each ball out into a 3-inch disc and place it on top of a ball of dough, using the palm of your hand to flatten it out a little.
- Using the tip of a sharp knife, score through the topping paste in a shell pattern. (Don’t worry if the topping disc cracks at this point, or during baking; this is characteristic of conchas.)
- Proof in a warm place, uncovered, until they have increased in volume by about 50%, about 3 hours.
- Meanwhile, preheat the oven, with racks on the middle and top thirds, to 375F.
- Bake for the conchas for about 20 minutes, swapping the positions of the pans at about 12 minutes to ensure even baking. The topping should feel set and the rolls underneath should be slightly browned.
- Cool on a wire rack.
Oh these look great!! I love conchas and have been looking for another recipe to compare it with the other one I’ve tried. I’ll be bookmarking this one.
I have never made conchas before, bought it from our local Mexican bakery, theirs were very dry and no flavor. I would like make this but was kind of loss following your recipe but what happen to the sponge dough? Do we mix it in with the final dough? Please help. Thanks.
They are lovely! I haven’t heard of them before. Unfortunately we don’t have a lot of Mexican culture up here in Canada. I would love to learn more about it – the foods look so inviting.
Oh cute! I will have to try making those…maybe for a bake sale or something. Or just to eat 🙂 But they are just so cute!
Pan dulce were always my favorite bread at the Mexican bakery by my house growing up, but I have yet to find a good one where I live now. With your changes, maybe I’ll just make my own now, because those look wonderful!
mylittlechateau, yes the sponge goes into the final dough. Thanks for spotting my omission — corrected!
I totally love these rolls. Never heard of them before, but they look like a lot of fun to make (and eat). Cheers for your wonderful coloring-tricks!!
These are absolutely beautiful! I don’t know the real thing, but I like your colourings!
How beautiful! I love the idea of using ground up berries to color the paste – thanks for yet another inspiring post!
These are so naturally beautiful! — far more tempting than the brightly colored versions I have seen, but never been tempted to try.
They look beautiful, Susuan. Really liked the idea of using natural toppings. I had made these a couple of months back and know just how good Conchas get.
that’s a great idea!
Nice display of scoring patterns.
Acai’ has a very strong taste, which is definitely not a crowd pleaser (I grew up watching my Dad drink gallons of it, but could not stand even a sip until I was into my mid-twenties.. 🙂
I am wondering if you can detect the taste in the bread.
They are very beautiful….
They are beautiful. I totally meant to make bread for this event–I love the theme–but with everything else going on (ok sick kids, but over and over and over sick kids!) I totally forgot. Your food coloring choices are inspired.
I love conchas and I have to say in Mexico and out these are the best looking conchas I ever saw. Your conchas rock!
Dumb question, but can this be made with a levain???
How does sweetened and enriched dough effect levain in comparison to yeasted doughs, if at all??
YOur humble and lazy baker!
Perfect timing with Easter right around the corner! Thanks for the hints on natural coloring. I’m not a big fan of the fake stuff either, but then I don’t know too many forks that are these days. It seems the food manufacturers are lagging behind the thoughts of us wholesome characters once again. But, alas, we have you; Muchas Gracias, Senorita! 🙂
I’ve never eaten one of these treats. This will be a bookmark and a bake!!!!
Those are so beautiful and look delicious. I have Diana’s book so will have to consider making these.
I have never seen prettier conchas. Just lovely!
This post has inspired me to make conchas! I’m going to use a recipe with less egg, though (since I’m vegan and want something more easily adaptable)….which leads me to these questions:
Can any bread dough be refrigerated overnight like this one, without reducing the amount of yeast?
If so: would that lend different results than if you were to reduce the amount of yeast and let the dough rise at room temperature? (does it work like that?)
Thank you everyone! I had fun making these.
Sally, I know what you mean about the acai. In this small quantity, I can detect a hint of tartness but otherwise the acai flavor does not come through. However, I’m not sure I would use it again, as it produced a brown color, where I thought it would be dark red or purple.
Miriam, many doughs can be retarded but you should not necessarily adjust the amount of yeast if you are going to do so; normally you would just plan to ferment it longer at a cold temperature vs. a shorter time at a warmer one.
What fabulous ideas for applying color with using food dyes. I have to give this a try. Your conchas are beautiful,Susan.
These look just wonderful! I am so glad you participated this month and even more so you got really creative with the colored tops. I am always hesitant to eat the bright colored conchas, but I would DEFINITELY enjoy one of these!!
OMG, these look divine! The pictures are stunning. What a fantastic job you did here!
Gorgeous! I love your use of natural color alternatives. I’ll have to try that, artificial colors make my kids crazy!
These are just beautiful. Conchas are delicious. I made a recipe from Beth Hensperger, but I used Kennedy’s topping recipe.
Susan, I have tried to leave a comment to your breads before but for some reason I was not able. I have learned so much from you and want to thank you for sharing all your knowledge with us and being such an inspiration. Tonight, I came to your blog to check your Norwich Sourdough and found conchas, to my pleasure. I adore these miniature breads so much that I am weighing ingredients to make them tomorrow.
Thank you so much.
Vesna
Susan, I made the conchas today and they are absolutely gorgeous. Thank you for one more beautiful recipes. I divided the topping to quarters. Used 1/2 T powdered sage in one, 1 T cocoa powder in another, 1/2 tsp liquid red color (organic, natural) in third, and 1/2 tsp liquid yellow color (organic, natural) in fourth one. These are mine conchas: http://img195.imageshack.us/i/conchas1011.jpg/
I meant to post the link for the picture where you can see all the colors.
http://img203.imageshack.us/i/conchas1012.jpg/
Susan, I just mixed up the sponge for the conchas and it’s very crumbly. The water measurement is 1 TBSP, is this correct?
Shannon, yes, one tablespoon of water. Don’t forget the egg, which adds quite a bit of hydration. The sponge will still be fairly stiff, though.
Por eso estamos gordos!!!! jajajaja
Desde ya me pirateo tu receta, es genial!!!!!
I want to make those too! They’d be a healthier alternative on any carnival table than our beloved jelly doughnuts.
Susan, I *adore* conchas and made these today! They are delicious but I have to say… the topping was off for me! I weighed the ingredients and while it tastes delicious, it seemed too dry… So it didn’t flatten out as much as yours (mine crumbled) and didn’t quite expand with the rolls in the oven the way I had hoped. Not sure what I did… regardless, they are so tasty! Thanks for the recipe!
increible trabajo cuanto tiempo tienes escribiendo ?