Ah, summer… corn on the cob, lazy reading in the hammock, and… sourdough starter, of course!
I’ve been taking advantage of this warm weather to try raising some starters from scratch. I had done it before in a week-long class (in fact, that’s the starter I’ve been using for months), but we were able to keep our cultures at a constant 80 degrees F, and we added extra malt to jump-start the process. I wanted to see how it worked with just flour and water, in the warm but fluctuating room temperatures of my non-air-conditioned house in these beautiful early summer weeks in northern California.
Success! Raising a starter seems to be something that is perceived as mysterious, complicated, or hard. But in my experience, it’s not; it just requires attention and patience.
I did this a couple of times, once with rye and once with whole wheat flour. Both worked, but the rye worked better, so that’s the one I’m summarizing. (Note: this ends up as a white starter. The rye is just in the beginning, to get things going.)
Ready to try it?
Sourdough Starter from Scratch
Ingredients:
- White flour (bread or all-purpose), preferably one that contains malted barley flour. Most white flours do, but some do not, especially if they are organic. Check the label.
- Rye flour.
- Water. I use bottled (not distilled) water because I don’t want the chlorine in tap water, and I do want the minerals that are removed by my water softener. If your tap water is not softened, you could let some sit out for a few hours to allow the chlorine to dissipate. All the water should be at about 85F; the yeast you want to nurture likes warmish water. I heat a small amount of water in the microwave and mix it with room temperature water, checking it with an instant-read thermometer. If you don’t have one, the water should feel about neutral to the touch.
Equipment:
- A 1-quart or larger container with a lid, preferably transparent and with straight vertical sides (this makes it easier to gauge the activity of the culture).
- A kitchen scale. If you don’t have one, get one. In the meantime, I’ll give the approximate volume measurements. But just this once; really, weigh your ingredients! (I never said I wasn’t opinionated.)
- An instant-read thermometer is useful for checking water temperature.
- A rubber spatula or plastic dough scraper.
- Transparent tape.
- A way to heat water.
- A warm(ish) place, preferably around 80F. The room I used fluctuated from low 70’s to mid 80’s. A room thermometer is helpful.
General process:
- The stuff you’re growing is a “culture” before it is mature and stable enough to bake with, at which point it becomes a “starter.”
- The volume measurements I’ve given do not corresponding exactly to the weight measurements, but the proportions are the same. Don’t mix weight and volume measurements.
- You will initially leave the culture alone for 24 hours, after which you will “feed” it at 12-hour intervals; choose your starting time accordingly. I arbitrarily assume you’re starting in the morning.
- Feeding involves removing and discarding a portion of the culture, and adding water and flour to what remains: first mix the culture and water together thoroughly, then add the flour and mix until thoroughly blended.
- Before you begin, it’s helpful to mark the weight of the container on the bottom with a Sharpie, or note it elsewhere. Then when it’s time to discard some of the culture, you can just keep taking some out and weighing the container until you know that the remaining culture is the right amount. I do not wash my container between every feeding.
- Contrary to a somewhat popular belief, it is OK to use a stainless steel spoon for mixing.
- After mixing, use a spatula or dough scraper to squeegee the sides of the container so they’re nice and clean. This helps you see how much the culture has risen, and keeps things tidy.
- When you’re done mixing, smooth the top of the culture flat as much as possible. Place a piece of tape running straight up the outside of the container, and mark the level of the culture. This is how you will know how much it has risen.
- Replace the container lid when you’re done mixing. If it’s a screw on lid or mason-jar type, you may want to leave it a little loose to give accumulated gas an escape route. If it is a plastic snap-on lid, you can snap it tight; the lid will pop off if the pressure inside gets too high.
Day 1 AM:
- Make sure your container is clean, well-rinsed, and dry.
- Mix 100 g water, 50 g rye flour, and 50 g white flour (or 1/2 c. water and 3/8 c. of each flour.)
- Leave the culture in its warm spot for 24 hours.
Day 2 AM:
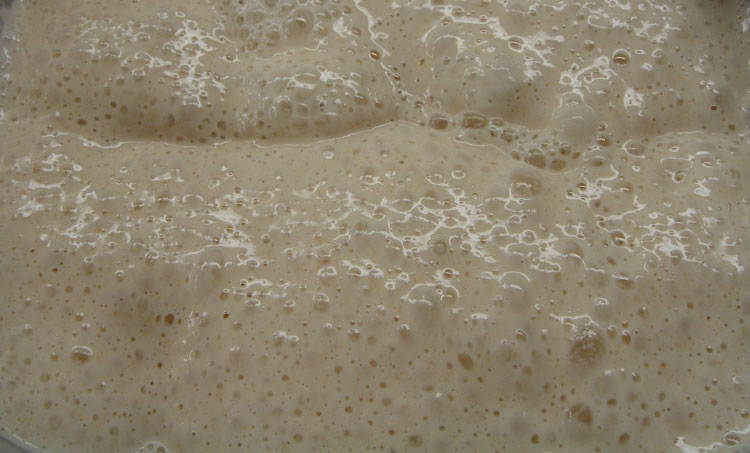
- Hopefully you will see signs of life. Has the culture risen a little? Are there any bubbles in it, even one or two? (These are sometimes best seen by picking it up and looking at it through the bottom of the container.)
- It is possible that you will see a large rise (50% or more) at this point. Don’t be fooled; this does not mean you’ve birthed a miracle baby. In the initial stages of a culture, a type of bacteria called leuconostoc may predominate; it produces a lot of gas and causes the rapid rise. This bacteria is not desirable, but not harmful either, and it will eventually die out as the beneficial critters settle in and the culture becomes more acidic. You may also notice that the culture has a rather unpleasant odor; don’t worry, this too shall pass.
- (If you see absolutely no sign of life whatsoever, I suggest leaving it alone for another 12 hours before proceeding. If there is still nothing, why not forge ahead anyway and see what happens?)
- Discard all but 75 g of the culture. Feed this with 75 g water, 25 g rye flour, and 50 g white flour (1/3 c. starter, 1/3 c. water, 5 teaspoons rye flour, and 1/3 c. white flour).
- Set it back in its warm spot for 12 hours.
Day 2 PM:
- You may see signs of activity, but the culture may be either more or less lively than what you saw this morning. Anything from a single bubble to a 100% rise is good.
- Again, feed 75 g of culture with 75 g water, 25 g rye flour, and 50 g white flour, and return it to the warm spot.
Day 3 AM:
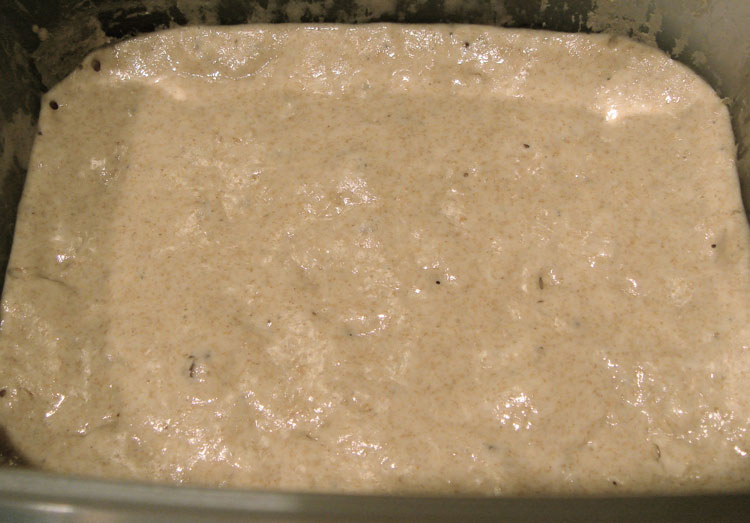
- Your culture may appear dead, but it’s probably not. Don’t worry, just go ahead and feed as before.
Day 3 PM and every 12 hours thereafter:
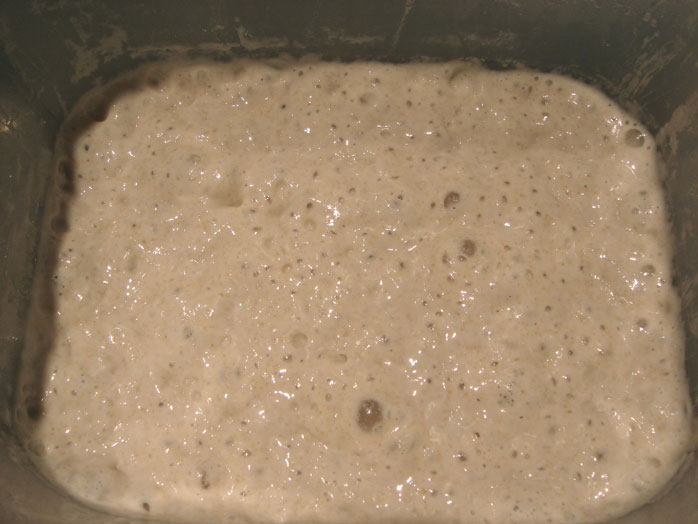
- Continue to feed as you’ve been doing. At some point things should pick up steam, and you will notice that the culture gets a little more vigorous with each feeding.
- When the culture at least doubles itself in 12 hours and is looking nice and bubbly, start feeding with only white flour (75 g culture / 75 g water / 75 g flour). This happened for me around the end of Day 4.
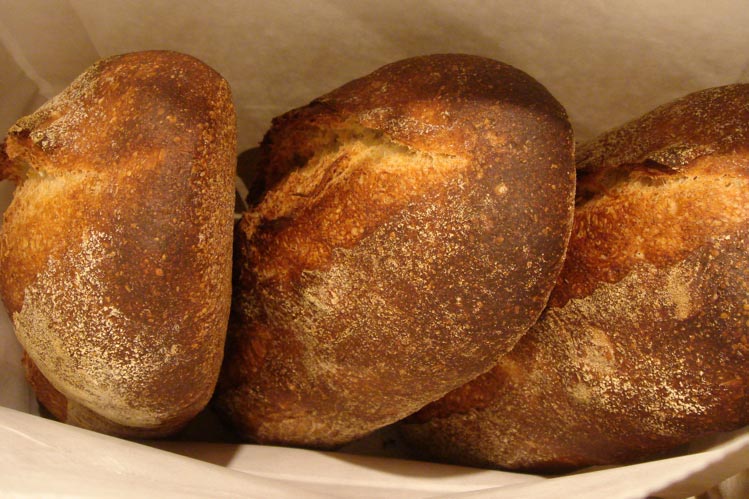
- After about 5 – 7 days, hopefully you will observe that the culture can double itself in 8 hours or less, smells pleasantly sour, and is full of bubbles. Congratulations, you have raised a 100% hydration starter that’s ready to bake with! If you’re looking for a recipe, how about this Norwich Sourdough?
- At this point you can also start decreasing the amount of culture in relation to the feeding flour and water, and use room-temperature instead of 85-degree water. You have been mixing 1:1:1 culture:water:flour at each feeding. Now try 1:2:2 and see if the starter can still double in 8 hours or less.
I’ll say more about the care and feeding of my starter in a near-future post.


update: 10 hours in, and it’s grown 4x in size…this is crazy!
Ben, tripling or more is not a bad thing! if it is increasing in volume but then falling back and becoming more “flat” before the next feeding, try feeding it more flour and water per unit of culture (or less culture per unit of flour and water, to keep the container size reasonable 🙂 ). You can also feed more often, but that seems cumbersome to me. If, on the other hand, the culture is at “peak” when it’s feeding time, then don’t change anything!
Well it ended up overflowing the jar by the time I fed it last night, so I don’t think it’s flat! I used some of it in your english muffin recipe which came out great. I now have a much smaller culture going which is still going strong, but is a lot more manageable. Thanks again!
Could we substitute whole wheat flour for rye?
Mariam, yes, you can do that. Rye works a little better if you can get it, but WW will work, too.
OK, put together my starter this morning using your guide here and we shall see if I can gather the right critters to make a delicious Utah sourdough. It’s been more than 10 years since I’ve tried to raise a starter from scratch and last time was a miserable failure. Fingers crossed!
Hi there,
I’m on day 4 of my starter and so far it seems to be doing what it is supposed to (I think). It had a huge rise on the first day, and a good response on the second. Not much on the 3rd day but I think that is to be expected. The unpleasant smell seems to be going. So this morning is day 4 and it looks much the same as yesterday. I’ve just fed it but was wondering about the viscosity. It appears to have the consistency of builder’s putty. It seems to become a little ‘runnier’ after 12 hours but I read somewhere that a thick starter is harder to work with for a novice sourdough baker.
I live in Hong Kong, and the environment is very humid and sticky, if that makes a difference. I’m still using a combination of white/rye flour to feed it and have been reasonably pedantic about weighing etc. Thanks.
Hello Susan!
Thank you for all of the insightful info over the last years!
I do have a question…
I`ve been attempting to make a sourdough panettone for at least three seasons now, and somehow (no matter how meticulously I follow starter conversion directions) my first dough struggles to move even an inch after countless hours.
I tried an experiment this time round, feeding both a liquid starter every 4 hours, and simultaneously feeding a stiff starter every 12hrs. and wrapping in a cloth etc.
Both looked good at the first dough mixing stage, but perhaps not quite good enough?
Feeding the stiff starter every 4 hours seems to really weaken the activity…
Could I be missing something really important here?
Thanks!
Maike
Maike, when you are feeding your stiff panettone starter every four hours, make sure you are keeping it nice and warm (85F is ideal). Otherwise it will not have enough fermentation activity to support the frequent feedings.
Hey Susan,
Thanks for the speedy reply-
I have however, been quite diligent about maintaining my oven temp. between 80 and 85F. Something tells me that the ratio 1:1:0.5 (starter: flour: water) might be too much flour for the amount of starter?? Whenever we feed our starters here at our bakery, we never really go up to the 1:1 ratio since it would take so long to become active again.
Any further thoughts?
Thanks so much-
Maike
Hi Susan, not sure why I’m not getting more growth out of my culture. I’m on day 8, but I’ve yet to see it double in 8 hours. I’m feeding it 25g Bob’s Red Mill Rye, 50g King Arthur AP Flour, and 75 g water 2x per day. I see a few bubbles and a pleasant smell, but nothing like what I should be seeing. Should I try switching to a different flour? Like one containing more malted barley? Also, it’s chilly in Seattle. Any cool weather instructions? Thx-
False alarm Susan,
Got home yesterday and had terrific bubble activity and could see that it had doubled while I was at work and then fallen back to orig size. What a diff a day makes! Thanks for all the great info. looking forward to some norwich sourdough this weekend.
Roger, glad it seems to be coming alive! It does take longer when the temperature is cool. In the early stages, keep it as warm as possible. A closed space like the microwave, with a bowl of hot water, is helpful in cool weather.
Thanks Susan. I love your site, great information here. I’m sure I’ll have more questions, thanks for sharing!
hello susan, first of all thank you for the great article! this is my third attempt on raising a starter, something I was wondering… is there any chance my starter could be “working” on the second day? even after reading about the leuconostoc part I just wondered that because my “starter” doesn’t smell unpleasant, it has a very “fruity aroma” actually, and the other times I tried to raise a starter, after this “first rise” my starter never raised again, even after a couple of weeks feeding it…
i was just wondering about it because I live in Brazil and here where I live is particularly hot these days (something around 86f or so) and when I tried to raise the starter on my fridge it never started to bubble, seems like it’s frozen or something =P
well, thanks again for a great website I love baking and am learning lots of great things in here, gonna try to feed this new starter a few days as you described and see what happens, thanks!
well nevermind my previous post, is finally working! well, at least is looking a lot like the picture from the day 3, thanks a lot! hopefully I will be able to bake a pandoro before christma rofl
Hi Susan, after our Seattle cold-snap and going through lots of flour, my starter is finally doubling between feedings and doing what it shoudl be doing. FYI, I went from using King Arthur APF with Bobs Red Mill Rye, to straight Gold Medal APF to now using Gold Medal Better for Bread Flour. The blob that is eating Sammamish seems to like the B4B flour and I’m not changing anything for a while.
Question: If I plan to make the Norwhich Sour Dough this weekend, how do you suggest I build up my starter to the 360g your recipe calls for? Should I feed it as per usual and on Friday night reduce to 75g starter and add 180g each flour and water?
Thanks- looking for a baguette recipe if you got one. Hopefully the Norwhich goes well.
Roger, yes, feed as usual and on the feeding before baking, adjust amounts (but not ratios). As for a baguette, you can shape the Norwich into baguettes but you might like Sam Fromartz’s version: http://www.wildyeastblog.com/2009/06/16/baguettes-fromartz/
Hi Susan,
Thank you for this very informative post. I want to start my own sourdough culture from scratch, too. But there are some major concerns:
1. I live in the Philippines and the average weather here is 30-32degC, and is practically humid. I know yeast loves hot and humid environment but…
2. We don’t have unbleached wheat flour here nor rye flour.
3. I don’t have a refrigerator to keep it in (as other bakers would suggest a once a week feeding and rest of the days to be kept in the fridge).
Can I successfully maintain my own starter here?
(a follow-up comment…)
I want to try Panettone too, but I don’t know how without the use of a mature starter. 🙁
I have been browsing online more than 3 hours today, yet I
never found any interesting article like yours. It’s pretty worth enough for me.
Personally, if all webmasters and bloggers made good content as you did, the net will be a
lot more useful than ever before.
Thanks for sharing your method — I’m so glad to find one that doesn’t involve fruit! My starter (named Zeke) was born in a cold winter kitchen. I started getting a few paltry bubbles after the first feeding but things weren’t picking up steam as the days stretched into a week, so I decided to switch to a 2:1:1 ratio and feed every 24 hours and Zeke is really starting to liven up! I think that a loaf of Norwich is in our near future. Thanks for your guidance on all things wild-yeast!
I forgot to mention that Zeke really took off after a day or two of that modified schedule I mentioned above and I went back to the method you described. I didn’t want to starve the little guys! He just needed a little boost to get the population higher. Thanks again for all the helpful information in your posts and comments!
Hi Susan, I’ve really impressed my friends by following your starter instructions and making a ton of Norwhich Sourdough. One friend however has professed a dislike for gluten and has some strange idea about developing a gluten-free bread starter from kombucha. I suspect if it can be done, you know of a better way than kombucha. Open to your suggestions… thanks again for your gift of great bread-Roger in Seattle
Are you harvesting the liquid bubbly stuff to use in a recipe or are you using the flour as well. Please advise
Tammy, can you clarify your question? The starter is the liquid bubbly stuff that results when the flour (mixed with water) undergoes fermentation.
Susan, thank you for all that you do, and taking the time to answer our questions :).
I want to try the Norwich Sourdough, and because I need 360 g for the starter, I don’t really know which is correct. To use 120g mature culture (the one that I got from 75g culture, 75g water, 75 g flour) 120 g water, 120 flour and I can get 360 in total, OR to use the ratio 1:5:5 that means 33 mature culture, 163.5 water, 163.5 flour.
Can you advise me which one of these should I use?
Thank you!
Susan I want to try the Norwich Sourdough, and because I need 360g for the starter, I don’t know which of these is correct.
To use 120g of the mature culture ( the one that I get from 75g culture, 75g water, 75 g flour) and 120g water, 120g flour, OR to use ratio 1:5:5, that means to use 33g mature culture, 163 g water, 163 g flour.
Can you please advise me which of these should I use?
Thank you so much for everything you do!
Hello, Susan. Today is second day of my sourdough starter. It was doubled after first 24 hours. I’ve feed it one time in the morning. It’s only 5 hours left and it is doubled already. A lot of bubbles inside. What should I do? Keep feeding it or I can use it now? Thank you!
really very tasty food so you have a nice choices good luck 😛
I have a white starter that I have kept live for three years. when I make a white loaf, white starter and white flour the crumb always has a brown tinge. Why?
Hye. I really like your starter recipe. Ive done it before and bake some quite awesome bread with your recipe because you explain it better! But, i find that i disgarded a lot of the flour and i feel sad for the flour, precious flour when making the starter. I really wish that you can give a starter recipe that doesnt require to throw out a lot of it. Anyway, great blog!
Yes of course this is fantastic info and great work have been done.. so nice keep it up…thanks for share
careful using Rye, you may very well end up with a batch of LSD laced yeast.
try using brushed potato skins (the traditional method) for starting yeast cultures, its a lot safer
If some one wants to be updated with most up-to-date technologies
after that he must be visit this web page and be up to date everyday.
f886fcee0654a758d6b6c99824faf9f6
is there a best time of the year to attempt a Starter?
Are these little spores more active in Spring?
My first attempt many years ago was successful…I neglected it and
it eventually died off. I’ve not been successful since.
This post gives clear idea for the new users of blogging, that genuinely
how to do blogging.
f886fcee0654a758d6b6c99824faf9f6
Responsável por mostrar essa vista mais fantástico do Rio com Janeiro,
bondinho do Sustento desde Açúcar é um ícone mundial da cidade
e amanhã completa 100 anos!
f886fcee0654a758d6b6c99824faf9f6
I did everything as instructed and I am on day 9, however it has not doubled or has a nice sour smell. What went wrong? please advise.
Is it possible to double the recipe for a larger amount of sourdough starter?
The Magic Number…
…of days is 10, i.e., TEN.
Well, so I’ve read. And in my experience that’s about how long it takes to get a viable sourdough culture. It’s been 10, and my most recent attempt has failed…
Thank you for NOT recommending starting with fruit juice (like unsweetened pineapple). I recently gave that one last try, emphasis on “last.” It never worked for me before, and just failed yet again.
My only success has been with the method you outline, AND the ingredients you recommend. If fruit juice works for anyone else here, that’s fine, but it’s the final straw for me.
So, in 10 days from tomorrow, using your method, I expect to be able to bake some decent sourdough bread for the first time in about 2 years. I am so looking forward to that, and am confident it will not fail.
Again, thanks for reminding me of the only method that’s ever worked for me.
do you have recepe for Norwich sourthoug