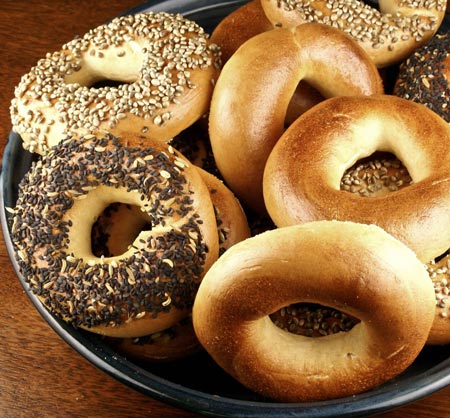
I am not a bagel expert. I do not claim to know how to identify or bake an authentic bagel. However, I do know what I like, and I like dense, chewy bagels. Bready bagels are just bread in the shape of a doughnut. What’s the point of that, please? And to get a chewy bagel, you need one thing: gluten, and lots of it.
I make bagels often, and normally use high-gluten flour (King Arthur Flour’s Sir Lancelot) to achieve the stiff, smooth, incredibly strong dough that yields optimal chewiness. This time, however, when I went to reach for that flour, I came up empty-handed. And because it was the hottest day of the year, I just had to have bagels. (You’re the same way, right?) Vital wheat gluten to the rescue.
Vital wheat gluten looks like flour but is essentially pure gluten. It is readily available, packaged or in bulk, in many grocery and natural foods stores, or can be ordered online. I found that replacing the high-gluten flour in my usual sourdough bagel recipe with a mixture of 97% flour (the regular flour I use for bread) and 3% vital wheat gluten gave me a bagel that was virtually indistinguishable from the original.
There are two schools of thought regarding bagel shaping. As with boxers vs. briefs, Mac vs. Windows, or over-the-roll vs. under-the-roll, people seem to fall uncompromisingly into one camp or another. Yes, I have tried the punch-a-hole-in-a-ball-of-dough-and-stretch-it-out method, but the roll-the-ends-of-the-snake-together method is far superior. It just is.
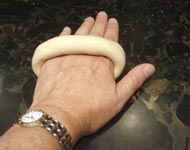
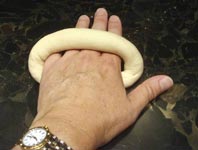
Roll an 85-gram piece of dough into a snake long enough to wrap around your hand so the ends overlap by about an inch. Dont’ taper the ends of the snake (i.e., do as I say, not as I do). If the dough is dry, spritz it with water. This will help the ends stick together better. Make sure you do not flour the counter or they will definitely not hold together.

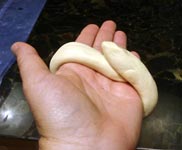
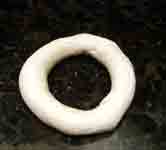
Roll the ring on the counter under your palm until the ends are sealed together and the ring has expanded so it flops back and forth on your hand as you roll. The hole should be considerably bigger than you want it in the final bagel, as it will close up as the bagels proof, boil, and bake.
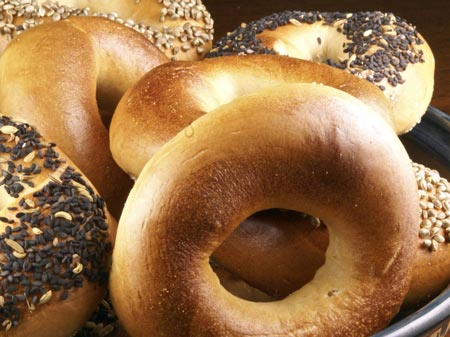
I topped some of my bagels with a mixture of black sesame, fennel, and anise seeds with some coarse salt and black pepper, and some with hemp seeds. The hemp seeds tasted good but are a little large and didn’t stick well. Plain bagels are of course also an option. How do you like yours?
For those of you who would like to chastise me for calling these sourdough bagels when in fact they are leavened by both instant yeast and sourdough, chastise away. And then go get yourself a life.
Sourdough Bagels with Vital Wheat Gluten
Yield: 16 small bagels
Time:
- Mix: 10 minutes
- Rest: 10 minutes
- Divide/shape: 20 minutes
- Refrigerate: 8 – 12 hours
- Boil: 20 minutes (includes heating the water)
- Bake: 22 minutes
Desired Dough Temperature: 78F
Ingredients:
- 655 g flour
- 20 g vital wheat gluten
- 296 g ripe 100%-hydration sourdough starter
- 299 g ice water
- 2.5 g (7/8 t.) instant yeast
- 16.4 g (2 3/4 t.) salt
- 12 g (1 T.) sugar
- 15 g (4 1/3 t.) non-diastatic malt powder
- 47 g milk powder
- Seeds for topping (optional)
- Semolina flour for dusting
- 1 T. baking soda for boiling
Method:
- Combine the flour, gluten, starter, water, yeast, salt, sugar, malt, and milk powder in the bowl of a stand mixer. Mix on low speed to combine.
- Mix on medium-low speed until the dough is very smooth and strong, almost rubbery, about 7 minutes.
- Turn the dough out onto an unfloured counter and work a few turns by hand. Form the dough into a smooth ball; the surface should feel satiny and tight.
- Cover the dough loosely with plastic wrap or a towel and let it rest for 10 minutes.
- Divide the dough into 16 pieces of about 85 g each. Form each piece into a light ball, cover, and let rest for 10 minutes.
- Meanwhile, line two cookie sheets with parchment paper and dust them with semolina.
- To shape each bagel, roll the dough into a cylinder about 8 – 10 inches long without tapering the ends. Wrap the cylinder around your hand, with the ends overlapping by about one to two inches in your palm. Roll your palm on the (still unfloured) counter to smash the ends together.
- Place the bagels on the prepared cookie sheets, slip into a large food-grade plastic bag or cover with plastic wrap, and refrigerate overnight.
- In the morning, preheat the oven to 450F.
- Bring a large pot of water to a rolling boil. Do not remove the bagels from the refrigerator until you are ready to boil them. Add the baking soda to the water once it is boiling.
- Meanwhile, place a cooling rack on the counter with a dishtowel underneath it, and place the topping seeds, if using any, on a small plate in a shallow layer.
- Drop the bagels, three or four at a time, into the vigorously boiling water for 20 seconds. They may or may not float right away, but they should float by the time the 20 seconds are up. If they float right away so the tops are not submerged initially, flip them over about halfway through the boil.
- Remove the bagels from the water to the cooling rack with a slotted spatula. Let them drain for about 30 seconds before pressing them, top down, into the seeds and replacing them back onto the semolina-dusted, parchment-lined cookie sheet.
- Turn the oven down to 400F once the bagels are in. Bake until golden brown, about 20 – 22 minutes.
- Cool on a wire rack.
Wow did I miss bake-bagel-day? Just came from Elizabeth to here and between the two of you I now know that I need bagels. Home made.
Except/Accept? that I can’t place a sheet of bagels in my fridge…hmmm I need a plan.
Yours look so shiny!
They are gorgeous!
I should try to make them again, my first attempt (BBA Challenge) did not turn out exactly as I expected.
Now I should write down the 97% – 3% ratio for vital gluten, because even though I have it, I never remember the correct proportion and end up NOT using it 🙂
It would be worth doing this just to top them with my own seeds like the fennel. I hate those cakey bagels that one can barely swallow. Maybe one day I’ll try this. It’s on the list.
Still itching to make brezeln myself, those bagels look great, you should try Simit, the Turkish bagel, good stuff!
I’ve been using your bagel recipe, Susan, and the only problem I have with it is that the bagels disappear so quickly!
Yum, I keep meaning to try your bagel recipe.
Who chastised you for calling these sourdough? They’re still sourdough, you just get bagels faster by using yeast too.
Have you made pumpernickel bagels yet? A shop near me makes them, they are so good! I haven’t found a recipe yet…
Haven’t try to make my one bagel yet. One day, one day…
i always do this for high gluten flour, but i’m not so exact. i just replace “some” of the bread flour with vital wheat gluten. it seems very forgiving. 🙂
Yum yum YUM! I love homemade bagels 🙂 Nicely done!
Well I’ll be! Just last night I was looking in my pantry and trying to decide what I would do with the vital wheat gluten I had left over from a seitan experiment. Now I know! Thanks!
Hehe – go get yourself a life indeed 🙂 Preferably one in which you’re stuck with only sourdough starter. Seeding with instant yeast makes things a bit easier (for me at least!). I have to confess though, I’m a shape the dough ball and punch a hole through it type. For some reason, the other method makes wonky shaped bagels for me. Tasty, just a bit wonky.
Well you certainly have me fooled! Grinning over the loop vs. cut in shaping. I’ve yet to try looping but if it would help me turn out bagels that actually had some color and a shape that didn’t resemble a flat tire, I’m all for it ; ) Thanks for your revisit – I’m still learning!
I have a lovely happy stash of sourdough starter in the fridge, in part thanks to the Bread Science book I won in your give away.(Great book by Emily Buehler, http://www.twobluebooks.com) and have been eyeing bagel recipes. I think your post is the last little push I need to get to making bagels. They look beautiful!
Those look perfectly dense and chewy – I love the tutorial!
These bagels, no matter how you made them, look fantastic! What perfect bagels! Is it bad and naughty to say they look bakery made? Well, okay, better then. I love dense chewy bagels and yours are just beautiful!
This bread is next on my list…I have the vital wheat gluten and the malt powder. Thanks for the tutorial~
Yummy looking bagels. Regarding your Intel vs. AMD question, I’d intuitively go for the roll-and-connect method as well. 😉
These are gorgeous, Susan. They look dense and chewy
and I loved the shaping lesson.
OK, that rolling tutorial was really helpful. When I shape my bagels by the “snake” method, they come unrolled. I foresee better results in the future – thank you!
it compliments, indeed optimal
What wonderful bagels, I love them. You have such smooth surface on them, I always get wrinkled top after the waterbath.
Pumpernickel Bagels – Mimi, if you google “Peter Reinhart’s recipe for pumpernickel bagels, you should find something that might interest you. Actually, just googling recipe for pumpernickel bagels will yield a treasure trove.
Love the use of your hand to size the bagel holes…great way to do it. I think the snake method is better, too.
Your boundless creativity has inspired me to award you the Kreative Blogger award. not sure how to do a link in comments, so come over to my blog and see the rules and pick up your badge!
Thanks for re-posting, Susan! I tried these on Friday/Saturday morning and they’re fun, easy, and good! I especially appreciate being able to do the prep at night and the cooking the next morning–so convenient…
I’m having trouble getting the same look of your bagels.. are they eggwashed, placed directly on the stone? Thanks!
my bagels look crusty.
Giovanni, the bagels are not eggwashed; the shine is from the baking soda in the boiling water. They are baked on a baking sheet. Are you using this recipe or a different one?
Why my bagel become shrink after water boiled and sometimes the sealing of the bagels will seperate from each other also. But i am quite sure the bagel are smashed very tight…..is it the proofing matters or what?
thx thx so much.
I took half the dough and added some dried blueberries. Will see how that works out! Also, I twisted about half the bagels – made a long strand, twisted and connected. There is a bagel place here where they make them like that, and they are amazing. Have you ever tried that?
Do you have any advise for the proofing if i want to make a bagel in the same day???
Any why my bagel surface become shrink after it comes out from the oven? is it the proofing problem? i found that is very difficult to control the fermentation, do you have any advise?
I used your 97% ratio AP flour/vital wheat gluten for Peter Reinhart’s bagel recipe and it came out great. Just as good (better?) than when I used high gluten flour ordered from King Arthur. I really hope more people try this method, since you can buy vital wheat gluten at places like Whole Foods… so there is really nothing holding you back from making high quality homemade bagels.
hi, i’m really interested in your bagel and really want to try it. but unfortunately some of the ingredients i don’t have and is really hard to find in my country like vital wheat gluten & non-diastatic malt powder also what the meaning of ripe 100%-hydration sourdough starter?
thanks , you blog is very great and really got me inspired
Use “bread flour”, “bakers flour”, or “strong flour” and simply omit the vital wheat gluten (VWG). These flours contain higher amounts of protein (i.e. gluten) which contributes greatly to the overall chewiness factor. I’ve made two successful batches of bagels without the addition of VWG. In fact, the two batches I’ve made have been using about 50% sourdough discard and 50% bread flour which has resulted in fantastic bagels (chewy, semi-dense, wonderful flavor). A wonderful way to use discarded sourdough starter!! I simply store it up in the fridge throughout the week and make bagels on the weekend.
From my research, NON-diastatic malt powder is exactly dry malt extract (DME), which is used in beer brewing. Aside from (supposedly) contributing to the even browning of the bagel, it contributes a classic New York-style bagel flavor but is certainly not a requirement to produce great bagels. Therefore, if you have a beer brewing store nearby you can buy DME there. Assuming you cannot find non-diastatic or DME, simply substitute honey, maple syrup, or leave it out altogether. Honey or maple syrup should still assist in the browning, and contribute a mild flavor of its own.
On the topic of browning, I’ve found that, aside from extra baking time, the baking soda-to-water ratio has much more to do with even browning than does the sugar addition in the dough. For my second batch, after reading a post on thefreshloaf forum, I use a ratio of 3 Tablespoons baking soda in 8 cups of water with a boil time of 1 minute per side. The browning was considerably better than the first batch of 1 Tbsp in about 8 cups water plus it made a nice flavor profile addition, however the bagels were more wrinkly with the 2 minute (overall) boiling. I think I’ll reduce the boil time per side to 30 seconds like Susan recommends to see if it will help with a wrinkly skin that appeared on my second batch.
The vital wheat gluten trick was exactly what I needed to make my bagels work. I actually found it at Wal-Mart for under $2. Using 97% bread flour and 3% VWG, my bagels turned out amazing.
I did not have anything malt, and frankly didn’t want to search around. Used brown sugar and had no problem browning.
I didn’t think homemade bagels were going to meet my NYC standard, but they absolutely did.
Hi. Newbie here. Is there a step missing for rising the dough after it has been mixed together for 10 minutes? Thanks for any advice!
Josette: the dough rests for 10 minutes after mixing and for another 10 minutes after dividing (before shaping). They bagels are put into the refrigerator immediately after shaping.
Hi Susan! First of all, congrats on your blog and breads, they all look delicious.
I’ve been trying to make proper bagels at home this summer and going crazy with high-gluten flour and vital wheat gluten. I’m from Spain and King Arthur flours aren’t available here so I tried with a 13% protein flour I use for brioche and I followed Peter Reinhart’s recipe from The Bread Baker’s Apprentice. They were yummy but not chewy. Then I bought vital wheat gluten and tried the same recipe using 97% of regular bread flour (about 12% protein) and 3% of vital wheat gluten. They were horrible, too stiff (like a shoe-leather).
Finally I’ve done this recipe and I think they’re the best I’ve made but they don’t look like the ones on your pictures, they swelled a lot in the oven and the hole almost disappeared. The result was very chubby bagels, they were soft while hot and became a little chewy when they got cold. Now, I must say there’s been a while since I’ve been in New York and tasted an authentic bagel so maybe I’m just being picky.
Thanks for reading this, I hope I haven’t bored you. Regards!
I”m going to have to try this! Thanks for sharing.
Thank you for bringing back your blog site! Last time I checked it was mothballed and more cumbersome to retrieve recipes. I’m sure it costs you something to keep it up, but you must know that (I’m sure) many people love your recipes. Sell a cookbook – I’ll buy it – to retrieve some money. I’ve relied on you for years to produce truly yummy breads and – especially – panettone! You are a treasure. I’m feeling thankful toward you….