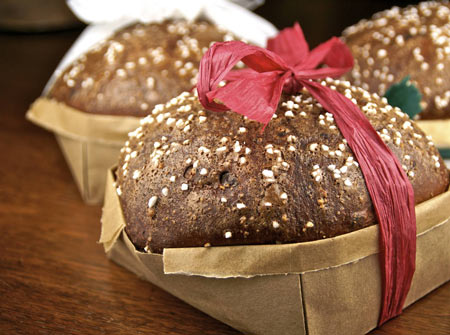
I had three goals in making this Chocolate Panettone, a new bread for me:
- To make a panettone that my daughter would like. M has an inexplicable dislike of fruit in bread, (indeed, in most baked things; this is inexplicable because she is my flesh and blood). Although fruitless chocolate panettone is not traditional, I have seen it now and then, and I thought M might give it a thumbs-up.
- To bake a panettone that, unlike the wild yeast one I usually bake (and love), does not take a good 30 hours to make. While that is a delicious panttone that keeps quite a long time, and the weekend-long process is starting to feel like a necessary holiday ritual for me, sometimes you just can’t invest that kind of time, and why should that have to mean going without home-baked panettone completely?
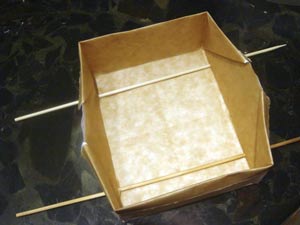
- To try my idea of making folded paper baskets to bake the bread in. You can of course buy paper panettone molds and other decorative, bake-in-to-give-away, paper “pans,” but they’re expensive (and I just like to make things).
So here’s how everything worked out:
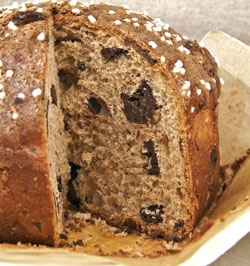 M did give the bread a big nod. She likes chocolate. She doesn’t like fruit in bread. I like fruit more than chocolate, especially in panettone. But if you have a chocolate-loving person who drives you crazy because she dislikes fruit and has a smart mouth and steals your makeup and doesn’t always call to check in when she’s supposed to, but who is brilliant and kind and hilarious and beautiful and makes your heart sing every day, chocolate panettone is a good thing to make for her.
I loosely adapted this formula from the (non-chocolate) Panettone With Sponge in Michel Suas’ Advanced Bread and Pastry. At only about nine hours from starting to eating, it was “lightning-fast” to make. It dried out faster than my regular panettone, which I attribute both to the lack of natural starter and to the lower percentage of butter in this one. Also, the flavor was not as complex, due to the faster process as well as the absence of fruit.
I would like to try a sponge-based panettone again, with more butter, plus the usual raisins and candied citrus fruits and minus the chocolate, to get a better idea of how it stacks up to the traditional natural-starter one. However, this is still a pretty good version if you want something fast(er), lower-fat (but don’t kid yourself, this is not a health bread), and chocolate. My co-workers loved it.
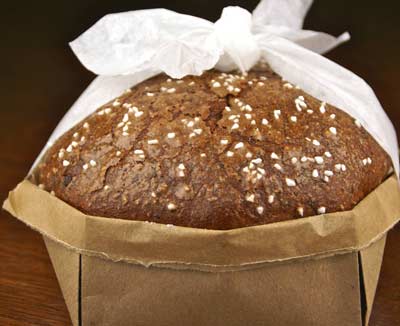
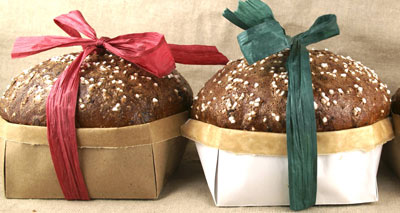
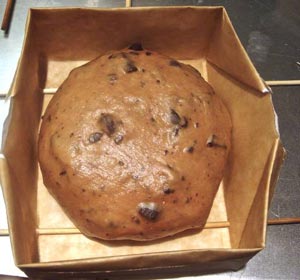
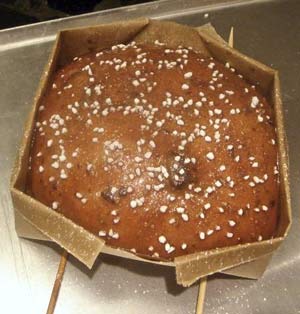
My homemade paper molds were a great success, if I do say so myself. Although they have a rustic look, I think they’re attractive enough for gift breads, and they’re easy and inexpensive to make.
I’m not an origami expert, but I found instructions for a simple basket, and made each one with two layers of paper — unbleached baking parchment on the inside and plain white paper or brown mailing paper on the outside — folded together as though they were a single sheet.
For these 300-gram panettone loaves, I started with 8 x 10-inch paper, which yields a 4 x 5-inch basket with 2-inch-high sides. I think I could have made the loaves up to about 350 grams for this size basket. If you know more about origami than I do, I’m sure you can figure out how to fold a mold with taller sides, more like the traditional panettone shape. But these are easy, even for a beginner like me, and surprisingly sturdy. I think they would even hold up to the wet batter of a cake or quick bread.
A couple of caveats: I avoided colored or printed papers, since I wasn’t sure if the inks would give off any toxic substances in a hot oven. If anyone has any insights here, please enlighten me. Also, paper burns at around 450F, so I wouldn’t use these for anything that bakes at above 425 or so. And I hope it goes without saying that you need to keep the paper well away from the oven elements.
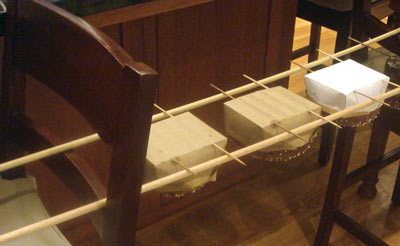
For general tips on making panettone, including why and how to hang it after baking, please read my original Panettone post. This recipe calls for the loaves to proof in a humid, 80F environment. Inside the oven, with the light turned on and an open bowl of hot water, works well; just make sure to remove the loaves before preheating the oven!
Chocolate Panettone (With Sponge)
Yield: about 900 g (3 loaves)
Time:
- Mix and ferment sponge: 2 hours
- Mix final dough: 30 minutes
- First fermentation: 10 minutes
- Divide, rest, and shape: 35 minutes
- Proof: 3.5 hours
- Bake: 35 minutes
- Hang/cool: 2 hours
Sponge Ingredients:
- 200 g flour
- 106 g water
- 4 g (generous 1 1/4 t.) instant yeast
- 33 g sugar
Final Dough Ingredients:
- 138 g flour
- 55 g cold milk
- 3.5 g (generous 1/2 t.) salt
- 2.2 g (scant 3/4 t.) instant yeast
- 55 g egg yolk
- All of the sponge
- scraped seeds from 1/2 of a vanilla bean
- 69 g fine granulated sugar
- 69 g unsalted butter, at room temperature, cut into 1/2-inch pieces
- 200 g bittersweet chocolate, coarsely chopped (include the chocolate “dust” generated by the chopping)
Glaze Ingredients:
- 55 g granulated sugar
- 3 g ground almonds (or almond flour)
- 4 g vegetable oil
- 4 g corn flour
- 4 g cocoa powder
- 30 g egg whites
- scraped seeds from 1/5 of a vanilla bean
- pearl sugar for topping
Special Supplies:
- three origami baskets or paper panettone molds
- six bamboo skewers
Method:
- To make the sponge, mix all of the sponge ingredients in a medium bowl until just combined. Cover and ferment for 2 hours at room temperature.
- In the bowl of a stand mixer fitted with a dough hook, combine the final dough flour, milk, salt, yeast, egg yolks, and sponge. Mix in low speed until the ingredients are just combined.
- Turn the mixer to medium speed if it has one, mix for a minute or two, then continue to mix while slowly adding the sugar, in about 4 or 5 increments. Mix for about two minutes between additions.
- Continue to mix in medium speed until the gluten is almost fully developed.
- Turn the mixer back to low speed and add the butter. Mix for a minute in low speed, then in medium speed until the butter is completely incorporated into the dough and the gluten has reached full development.
- In low speed, add the chocolate, mixing just until it is evenly distributed.
- Cover the bowl and let the dough rest for 10 minutes.
- Turn the dough onto a lightly buttered counter. Divide the dough into three pieces, and form each piece into a light ball.
- Allow the balls to rest, covered for 30 minutes. Meanwhile, run two bamboo skewers along the bottom of each mold or basket.
- Shape the dough into tight balls and place into the skewered molds. If you’re using rectangular baskets like mine, flatten the dough slightly so it spreads towards the sides of the basket.
- Proof at a humid 80F for about 3.5 hours, until the dough has increased approximately 2.5 times in volume. The bottom of the dough “dome” should still be below the top of the mold, although the top of the dough may be above it.
- When the dough is nearly fully proofed, preheat the oven to 350F, with the rack in the lower third of the oven.
- To mix the glaze, whisk all ingredients, except the pearl sugar, together. Brush the glaze evenly onto the top of the loaves (don’t worry if it pools where the dough meets the mold) and sprinkle with pearl sugar.
- Place the loaves directly on the oven rack and bake for about 30 – 35 minutes, until the tops are dark brown and the internal temperature is at least 185F.
- While the panettone is baking, set up your hanging apparatus. When the bread is done, hang them as quickly as possible.
- Allow the panettone to hang for at least two hours, until cool.
Why users still make use of to read news papers when in this technological world
the whole thing is presented on net?
cfc244449b003a8fa0907f4290d1e923
We’re a bunch of volunteers ?nd ?pening a brand new
scheme ?n ?ur community. Yo?r websire p?ovided ?s with helpful ?nformation to work on. ?ou’?e done an impressive process ?nd
our whole neighborhood m?ght b? thankful t? ?ou.
cfc244449b003a8fa0907f4290d1e923
looks very delicious. Yammy