If you think you can’t bake bread (which is probably a false notion, by the way), grissini are a sure-fire way to fast success.
These thin bread sticks could not be simpler to make. If you love playing with dough, you’ll get plenty of opportunity here. And who doesn’t love their eminently nosh-able crunch, not to mention the visual panache a bouquet of these babies adds to the dinner table?
The recipe, adapted from Baking Illustrated by the editors of Cook’s Illustrated magazine, uses a simple pizza dough. A food processor makes very short work of the mixing, but the dough may also be mixed by hand (7 to 8 minutes) or in a stand mixer (5 minutes).
If you don’t need 64 grissini, refrigerate half the dough and make pizza for breakfast.
Grissini (Thin Bread Sticks)
Yield: 64 bread sticks
Time:
- Mix: 2 – 10 minutes
- Ferment: 1.5 – 2 hours
- Divide/shape: 10 minutes per 16 bread sticks
- Bake: 25 – 30 minutes per 16 bread sticks
Ingredients:
- 623 g flour
- 397 g water at room temperature
- 6.5 g (2 t.) instant yeast
- 9 g (1.5 t.) salt
- 28 g (2 T.) olive oil
- topping of your choice (I used a mixture of coarse Kosher salt, coarsely-ground pepper, and chopped fennel seed, as suggested by the original recipe)
Method:
- Combine the flour, yeast, and salt in the bowl of a large food processor. Pulse a few times to combine.
- Combine the water and olive oil in a liquid measuring cup. With the processor running, add the liquid to the dry ingredients in a steady stream.
- Process until the dough is smooth and elastic, about 90 seconds.
- Place the dough in a lightly oiled container. Cover the container and let the dough ferment at room temperature until doubled in volume, about 1.5 – 2 hours.
- Preheat the oven to 350F. A baking stone and steam are not needed.
- Line a large baking sheet with parchment paper.
- Divide the dough into four equal pieces. The steps that follow will be repeated for each of the four pieces. Keep the pieces you’re not working with covered.
- On a floured counter, roll the dough out into a rectangle about 12 x 8 inches. The exact dimensions are not critical.
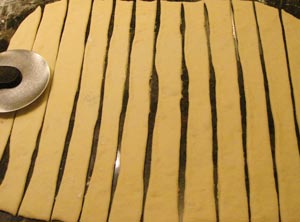
- Cut the dough into 16 strips of equal width. A pizza cutter works very well for this.

-
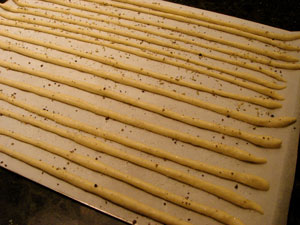
Fold each strip over on itself (according to Baking Illustrated, this makes it stronger). On an unfloured surface, roll the strip into a long snake. Make it a bit longer than the length of your baking sheet, to allow for spring-back.
- Place the snakes evenly spaced across the width of the parchment-lined baking sheet.
- Lightly spray or brush the grissini with olive oil and sprinkle on the topping.
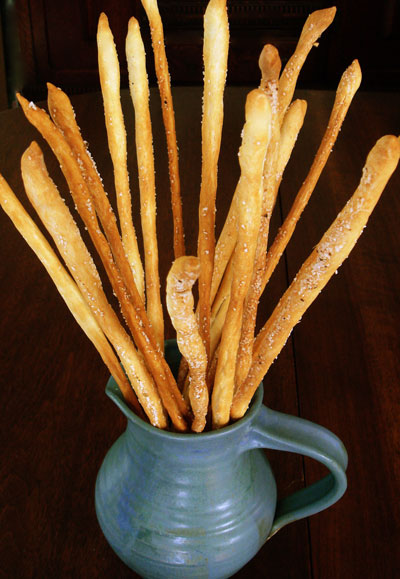
- Bake at 350F for 25 – 30 minutes, until golden brown.
- Cool on a wire rack.


Love these and the photo is beautiful 🙂
These are gorgeous. We had a restaurant who made grissini and had them waiting on the table when you sat down. I forgot about how wonderful that was until I saw your pretty photo.
Those look beautiful!
I see that you used commercial yeast for them. Have you ever used your wild yeast to make them? Please correct me if I’m wrong but they seem like they may be perfect candidates for the leftovers from feeding the starter.
-Elizabeth
Maryann, thanks! I had fun with the photos.
Mimi, to tell you the truth I used to make these a lot, but then I too kind of forgot about them until my husband requested them recently. It’s nice to have a memory jog now and then, isn’t it?
Elizabeth, great idea. Will you volunteer to try it and let us know how it works?
Susan great pictures and write up as usual! I have never tried to make grissini before! But dh’s birthday is coming up so that may be the inspiration along with your post!!!
BZ
Love your grissini as well as the way your took photo of them.
These are one of those things that I’ve always meant to try but just haven’t! I love the photos and my favorite part of the post is when you suggest saving half the dough for breakfast pizza 😉
BZ, thanks and I’m sure you will create a wonderful birthday meal, with or without the bread sticks.
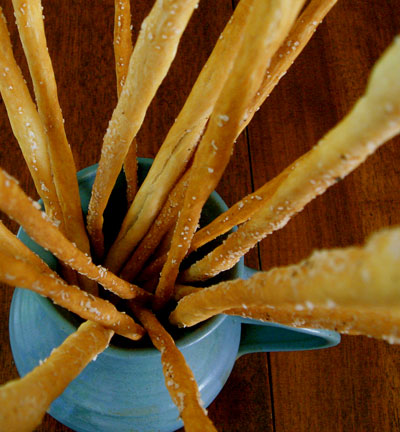
Hi Kim, I’m glad you like the photo. I like the way the grissini look in the blue pitcher, which was made by my husband years ago.
Nicole, I really do often make pizza for breakfast when I have leftover dough of any kind! My countertop oven is perfect for this.
Who me??!!
I’ll try to remember to do it. So often I can’t seem to get it together to actually do something wise with my leftovers. (Our composter is benefitting greatly these days)
-Elizabeth
I’ve got a lot to learn from you! I can’t believe I haven’t gotten over here sooner, but just looking at your bread, I’m going to be reading a lot as I try to figure out this bread stuff. I love the photos.
Elizabeth, no pressure, but if you do it I’d love to hear how it goes.
Curt, I have enjoyed your posts at Just Baking and I’m looking forward to seeing more bread from you there.
Beautiful grissini. I love to serve these at a wine and cheese. They disappear so fast!
Your grissini is wonderful. I have a recipe calling for these. Will be trying your recipe real soon!
Aimee, they do go fast, don’t they? Thanks for stopping by!
Anh, I’d love to see your recipe.
These look wonderful. I definitely need to try this recipe. I’m embarrassed to admit I’ve never made breadsticks! (Though I have had pizza for breakfast.) 😉
Hi Farmgirl Susan, don’t be embarrassed; you’ve been busy baking a lot of other delicious breads!
Farmgirl Susan, you MUST take the time to make breadsticks (I had never made them before a week or so ago either) They’re great!
And WildYeast Susan, they are the perfect things to make to use up the leftovers from feeding one’s wild yeast starter. (I used the leftovers and only half the yeast in our pizza recipe and had the perfect amount of leavening power.)
-Elizabeth
Wow, these look incredible. I’m sad to admit that I’m one of those people who think that they can’t make bread, but these look so yummy — definitely one I’ll try!
Susan, in step number 10, you have, “Fold each strip over on itself”. This is a lengthwise fold, yes?
-Elizabeth
Elizabeth, if by “lengthwise” you mean fold the strip so that its length is cut in half (e.g., an 8″ strip is now a double 4″ strip), then yes.
Susan, I’m so glad I found this recipe! Can I make these ahead of time? Any thoughts on the best way to store these if I can?
Oh!!! That’s what I did the first time and I thought that must be wrong. I guess I just didn’t roll them enough after folding them to make them really thin like yours.
(Isn’t the English language wonderful? By “lengthwise”, I meant so they were just as long but half the width… glad to have straightened it out.)
-Elizabeth
Susan, I thought you might be interested to hear that I have just weighed the “discarded amount” from building up my starter in preparation for making bread tomorrow. It is about 50gms. I’m guessing it’s usually that amount and that is probably how much I put into the pizza dough before making the bread sticks.
We used today’s extra to make waffle batter for tomorrow morning…
-Elizabeth
P.S. The buildup is 3Tbsp flour, 2 Tbsp water and 2 Tbsp starter. On feeding days (non-buildup days) I mix 2Tbsp water 2Tbsp starter 2Tbsp flour. Feeding days are two days apart. (I hope this made sense!)
Laura, they always get eaten pretty much right away in my house but I think it would be fine to make them a bit ahead and store them in an airtight container once cool. I’m guessing they would also freeze well. They’re already dried out, so no worries about that. Thanks for stopping by!
Elizabeth, thanks for the info. I’m going to try it with the leftover starter.
Love your photo of the grissini. I made some from a Locatelli recipe recently – couldn’t stop just at one stick!
j’adore tout ce que je vois mais je ne comprends pas l’anglais, sniffff….
Y, yes, they’re addicitve!
cachou66, et je ne parle pas bon français. C’est dommage!
Susan, I made these for my daughter’s birthday party and they were such a hit. I can definitely see why they don’t last long at your house 🙂 Thanks for this awesome recipe, I love it.
Laura, I’m glad the recipe was a success for you. Thanks for letting me know!
love these!!
I am going to make these, I think maybe some pesto or cheesy breadsticks are in order!
Bev, yours turned out great!
http://yummytummygrub.blogspot.com/2007/12/bread-sticks-grassini.html
Love this recipe. Had grissini whilst on holiday on Isles of Scilly of all places, with lovely sloppy hummous. Make my own hummous, but couldn’t find decent grissini anywhere. This recipe is so easy and results fantastic. My diabetic Dad is also happy as he can trust I haven’t snuck any sugar in there anywhere! Many many thanks, Jay
it looks great
i’ll try to do it
thanx
I would like to know where to purchase these breadstix. I have heard great things about them but cannon find them in my area.
question about measurements: the recipie calls for the following:
# 6.5 g (2 t.) instant yeast
# 9 g (1.5 t.) salt
I assume “t” means teaspoon. If that’s the case, why is 2 teaspoons the equivalent of 6.5 grams, while 1.5 teaspoons equals 9 grams? I don’t understand the metric system; perhaps my confusion is related to my ignorance.
i suggest changing the procedure slightly:
if you add the yeast to warm water as first step (perhaps with 1/5th of flour) and then add the oil without the water in a steady stream to mixing flour,salt,until all the oil has been absorbed, and then add yeasted water the proofing time could be reduced.
Oooooh!!! I am SOOO excited! I have to try and make these again… I have a grissini pan that I was given when I got married (divorced now!) But I always thought breadsticks were fat and soft like my mom’s… followed the recipe that came with the pan and they were thin and crispy… so bummed… UNTIL I ATE THEM!!! They were FABULOUS!!! Have long since lost the recipe… but now I have something to try again… will do it within the next couple of day! 🙂
Thank you so much for this post, it inspires me to try again 🙂
Absolutely delicious breadsticks! And you know what? Two days later I needed bread in a hurry so I whipped the leftover refrigerated dough into a boule shape… let it rise, baked at 460 for 40 minutes (it needed tenting). Awesome, tasty bread – thank you!!!
p.s. Made this up again this evening… I find this needs about 35g of extra flour in the food processor. I’m in Canada, using unbleached all-purpose; that could explain the discrepancy. Perhaps this can benefit others, and I’m also leaving it here as a reminder to myself for the future. 🙂
Do you have to let the yeast start in a seprate container per yeast directions, or just combine with the dry ingredients as stated?
Howard, if the yeast package specifies that it must be “proofed,” i.e., mixed with water and allowed to rest for several minutes before adding it to the dough, it is probably active dry and not instant yeast. See this post for more on the difference between the two: http://www.wildyeastblog.com/2008/01/12/instant-yeast/
This recipe, like most of mine, calls for instant yeast but you can substitute active dry if that’s what you have; the above-referenced post gives the conversion factor. Some people swear you can just add active dry yeast right to the dough as you do instant. That is probably what I would do in this case, rather than trying to mix it with warm water first; I’m thinking warm water might make the dough too warm, since it is mixed in a food processor.
Long answer to a short question 🙂
I just stumbled across your recipe and I am SUPER excited to try it tomorrow. My mother always talks about those break sticks she used to have a kid. The ones that stood up in the cups; the ones like her grandma used to make. She is making chicken parmigiana tomorrow night for dinner and I’m going to surprise her with a batch of these!!! I can’t wait to see how they will turn out. Thanks so much for this lovely recipe!
I just made these and baked them to the same color of your pics but they are very hard to eat ! Could this happen because my yeast is bad? I suspect it is, because the dough didn’t quite double. But, I’m a bit inexperienced to judge this.
Any other reason maybe?
I love your website! Thank you 🙂
Hi Susan, i like the idea of bread sticks, but i am a whole wheat person myself, and was wondering, can i substitute all of the flour for whole wheat flour in the recipe, or have you got a recipe specifically for whole wheat bread sticks? I did look at the flax seed bread sticks recipe, but i cannot acquire flax seed at this moment. Thanks in advance.
Waldron, you could use whole wheat flour but will probably need to increase the water a bit and bake them a little longer to make sure they’re dry. They are likely to have a denser texture than the originals.
Many thanks, will try 🙂
would this dough freeze well? i’m in the middle of planning a largely diy wedding reception, and i want to get started as early as possible on as much of the food as possible. if i started making these, would the dough be ok 6-7 weeks in the freezer?
Ashley, I wouldn’t vouch for the performance of the dough after freezing it. Freezing kills off some yeast so you’d probably want to add more — but I’m not sure how much, as I don’t have much experience with frozen doughs. As with anything new for an important occasion, I’d definitely recommend a test run!
Jes you can the dough four monds in de freezing.
de yeast is not killing in de freezing.
Thanks for this.
I made half a recipe of this yesterday for our New Year’s party and they were excellent. Takes no time at all and very simple to slot the making in during other prep during the day. They looked “perfick” on the table.
I found that twisting the sticks rather than rolling was easiest and added a few minutes to baking time to compensate for the additional thickness.
I’ll add a few different toppings next time.
For the scientifically minded these are 47.8 times better than the ones bought from the store
Greetings
I recently discovered yeast, and now make three Ciabatta loaves a week. Sorry Mr Warburton. I always use fresh yeast, which I keep in pre weighed out 12 gram packs in the freezer. I make all my dough in 500 grams of flour lots using Canadian strong plain flour. I also make Croissants, Pain au Raisin (same dough) and since I saw your delicious looking Grissini, I’ll be having a go at those as well. Can’t wait.
Could you PLEASE put it in regular Cups (Imperial) I am so tired of converting please!!!!!! These look good but if I have to convert it then forget it I don’t have time
Wouldn’t it be easier to use 625g of flour and 400 g of water? Seems like you’re overcomplicating this whole thing?
John – if you have a scale with a resolution of 1 gram, 623 and 397 grams are no more (or less) complicated than 625 and 400. If your scale has a 5-gram resolution, then of course you will have to round. I don’t find rounding, when I need to do it, complicated. 😉
I burst into laughter when I read the ingredients and their amounts. And then I kept looking for a good recipe.
Thanks for the laugh.
These bread sticks are so tasty and crunchy. I halved the recipe so that I could make the dough in my bread machine and they turned out perfectly. Thanks for the recipe.
If you only wanted to make half the amount of grissini at once, can you use the dough that’s refrigerated to make more grissini instead of flat bread?