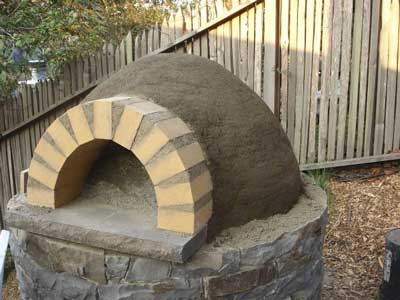
Have you ever watched mud dry? I can tell you it happens excruciatingly slowly. I know this because for ten days I have been monitoring the progress of a four-inch-thick, three-foot-diameter beehive-shaped shell as it transforms from a mixture of soil, sand, and water into a solid, heat-retaining, bread-baking wonder (I hope).
At last report, I had a hearth and a doorway arch. From there, progress was apace for a while. First I packed the spaces between the arch bricks with mud. The following morning, my sister and my niece helped me create the dome-shaped sand form.
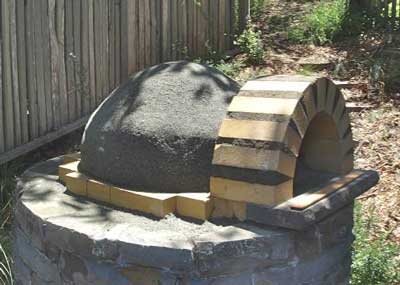
In the afternoon, I sent my helpers off in search of Tule elk while I covered the sand form with newspaper and set about building the mud up around the form. This may seem like a trivial task, but it took me six hours to finish approximately half the job. The mud is applied handful by handful from the base upward. It must be pressed firmly downward into its own slowly-emerging shape, never inward towards the sand form.
At the end of that six hours I was disheartened to find that I had made the mud mixture a bit too wet and it was starting to slump under its own weight. Kiko Denzer warns not to mess with it and try to push it back into shape, as this will only soften the mud more, but of course I found it necessary to test that statement. I can now verify that it is, in fact, true.
In my discouragement, I didn’t take any photos at this stage because I had pretty much decided that I would tear the whole thing down and start over. Because I was too tired to do it that day, I covered it with a tarp to keep it wet. I went out at 6AM (yes, morning person here) fully intending to have at it, but I found that overnight the mud had firmed up and settled and seemed like it might be OK.
So I decided to forge ahead (with a less wet batch of mud this time) and keep my fingers crossed. (They’re still crossed, just so you know.)
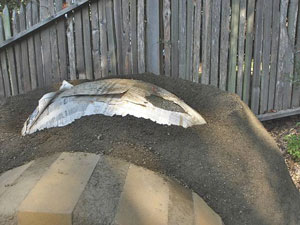
In the photo above, just the top of the dome remains to be built, but this is still about 2 hours away from completion. As the mud rises and angles up and in to stay perpendicular to the sand form, pressing the mud into itself becomes increasingly challenging, especially if the oven stands on the side of a hill.
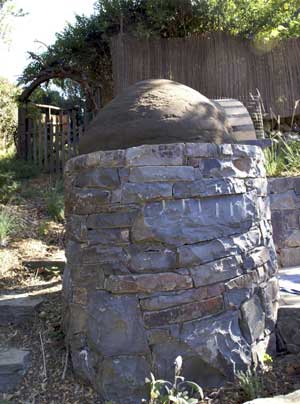
Four days after finishing the mud layer (first photo, above), I scooped out the sand and peeled away the layer of newspaper that separated the sand from the mud shell. I couldn’t quite reach it all, but this will burn away with the first fire.
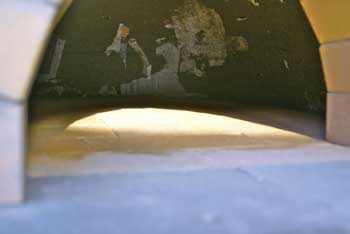
Now I’m waiting… and waiting and waiting… for the thing to dry. Progress is slow because the nights are cool and often dripping wet with fog, so I cover it with a tarp. Even during the day, the oven is mostly in shade. But I don’t think this slow drying is a bad thing in the long run, because I’m hoping it will minimize cracks, which are expected as the mud shrinks while drying. I’ve decided not to build a drying fire inside, but that means the suspense is killing me. Looks like my poor mud-parched fingers will have to remain firmly crossed for at least another couple of weeks.
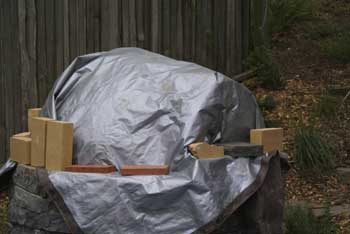
Once it’s dry, I can bake in the oven, but it won’t be completely finished until I add a four-inch-thick insulating layer (mud and sawdust) and a finish plaster over it all. This is going to take a while…
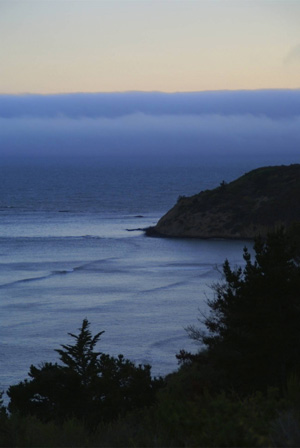
Too cool. Really.
I know it’ll be a while, but I can’t wait to see what you’ll pull out of that thing.
looks great! i love the arch.
you might try placing some charcoal briquettes in a pan inside to add a low heat to slowly dry the interior.
congratulations!
Great progress!! I am sure the outcome will be worth the wait – I can’t wait to see the first breads that come out of the oven!
OOOOO, I’m so excited to see the finished product and to hear about how delicious the bread is. I am so envious. Perhaps next summer I’ll build one.
Susan, very impressive! How many loaves do you think you’ll be able to bake at one time?
Wow..that is very impressive…
Wow, that’s the kind of project that makes me wish I had a garden. Phantastic!
😉
but, your getting closer and closer and I’m getting more excited to see your finally use this!
As exciting as baking bread only the result takes more time. Keep my fingers crossed; maybe it helps.
Oooh I’m waiting with anticipation for the next installment! I can’t wait to hear how it all turns out and hear about the first loaf of bread from it. (This is far better than any soap opera) :o)
Keep us posted!
Keeping my fingers and toes crossed for you.
Susan,
What is your first loaf you wanna bake in the oven?
Looks great, looking forward for more pictures, anticipaaaaation, is making me wait! (Carly Simon, so 70’s)
Are you going to have a party when you bake the first load?
Hey, question. How many breads will you be able to fit in one bake?
Egads. Now that I know what’s involved, if I ever build one of these, I’m going to have to mentally prepare myself. Congratulations!
What a process! I give you credit for all that hard work. What a cool thing you’ll have in the end.
I am SO impressed. I can’t wait to see the results of your extremely hard and intensive work. And it’s also a beautiful sculpture.
This is fascinating! Love that last picture, is that what you see from you house? Wow.
I am still so impressed with this! What a project. Well done for persevering when it seemed to be going wrong. I can’t wait to see how it bakes!! Good luck!
Susan,
Amazing! I am watching your progress with great interest. The house we live in had an outdoor brick oven when we moved in — yeah, that’s why I bought it! Ours is built into a wall of the open-on-three-sides pool house, so I have not seen the interior construction. I want to build a second, free-standing oven, so I am delighted to see how you are building yours. I’ve only baked bread in it once or twice, but we make pizza quite often and it is amazing — worth every bit of effort required to construct the oven! Good luck — can’t wait until you’re fired up and baking!
Looking Great Susan!
This will add a wonderful dimension to your baking world. I think that you’ll be adjusting hydration levels and baking times with this oven, eh? (Canadian,eh?)
amazing!!! you make me so unhappy to be living in manhattan. 🙁
Amazing work! I can’t wait to see the first bread baked in it.
It’s looking great! I’m really impresed with how nice it’s turning out.
Congratulations Susan!
I’m very envious and am looking forward to seeing what comes out of it when it’s ready to go! Some day I hope to have one of these in my yard too. Unfortunately that and any bread baking will have to wait until things settle down at the new restaurant. It’s taken me a month just to find the time to catch up with what you’re up to. Have fun with that oven.
WOW Susan…how cool is that. Building your own oven…YAY!! Oooooooh…can’t wait to see first pictures of a rustic loaf or other wild yeast popping out. Bet you’ve bookmarked something special for your first bake. In eager anticipation…Deeba
Yo! You are one dedicated baker! I am just thinking of all the goodies that will be coming out of it!
Susan, just curious if you had checked with your local fire dept in the SV area before you built your oven? I know in my part of the Bay Area one cannot build a brick oven because of the air quality and possible fire hazards.
This is so thrilling!! If our back yard wasn’t so ridiculously small and treed, I’d be tempted to see what it was like to watch mud dry too.
Doughman, I can see that there might be a difficulty with the air quality police because of the smoke but I’m guessing the fire hazard will be very low, judging from the following excerpt from http://dufferinpark.ca/oven/wiki/wiki.php?n=HowTheFirstOvenGotBuilt.FrontPage
…………………………………………………….
The [Toronto] fire department’s safety chief said that since the wood fire to heat the oven would be inside the oven chamber, the fire would not be an “open fire” with the associated fire safety issues. […] The fact is, there’s so much fireproof insulation around these ovens (inside the roof and wall cavities) that even when such an oven is over 800 degrees Fahrenheit inside, the outside walls and roof are hardly warm at all.
……………………………..
If I lived just a little closer to The Dufferin Park oven, I’d try it out. It is quite a bit larger than Susan’s but the outer layer of brick on the Dufferin Park oven appears to be somewhat similar in function to the outer layer of stone on Susan’s.
http://dufferinpark.ca/oven/wiki/wiki.php?n=HowTheFirstOvenGotBuilt.FrontPage
Thank you so much everyone for your kind comments and good wishes!
shimpiphany, thanks for the suggestion, I may try that.
SteveB, the oven is 31 inches interior diameter, so I’m guessing maybe 6 loaves.
Jeremy, Carly Simon is OK, just don’t give me any James Taylor. First loaves will be something I bake a lot and am highly familiar with, like high-extraction miches or Norwich sourdough. The first bake will be private, in case it’s a disaster, but after that, party for sure.
Astrid, this is not the view from the house, but nearby. The fog blanket is an almost-nightly occurrence.
Cora, please post some of your brick oven bakes on your blog!
Henry, absolutely there will a learning curve here!
Doughman, thank you for your concern. My oven is not in SV and does not violate local code.
I just stumbled upon your blog looking for cracker recipes and am thrilled to see your oven! We have one in our backyard too! A Kiko Denzer style earth oven — my husband rebuilt it this past year. It has become a very important part of our family. You will love yours!
I’m so interested in how your breads will look from that oven. Looks cute like an igloo, only, uh, 600 degrees warmer.
Hi there:
I was looking for a definiation and how to for 100% hydration starter when your blog came up and when I saw your outdoor oven, I am thrilled to bits. We want to build one ourselves too in our new house. Can you give us the recipe you use (like how much sand, etc to make your mud, the structure, etc).
Appreciate all your help.
Pat
that, my dear, is a thing of beauty.
What a great project! I love that you’re making the oven yourself!
Good luck with the project.
It looks great!!! I can’t wait to see it with your first products out of it. I am sure you will be so happy.
When is the first loaf out! I caught a couple of these posts on the oven while we were on the road and am so excited for you. Told my husband I want one when we build our next house.
Wow!! That is amazing! Where did you find the plans for it or did you just wing it? Please email me the link for them!
I can’t wait to see the finished and your first baking!
This oven is so cool. If I didn’t live in a highrise I would build one myself.
now l have an idea of how its done , l am going to make one