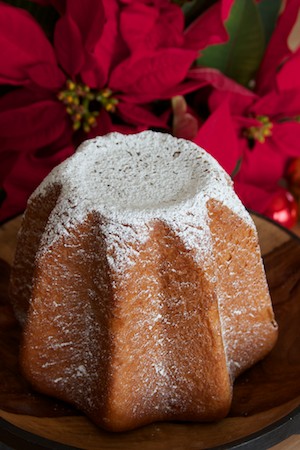
2012, be warned: 2011 is a tough act to follow. The beautiful and exciting things that came my way in 2011 are too numerous to count, but Number Two on the list has to be the trip Jay and I took to Morocco and Venice in November (with Number One being our wedding a month later). And while the highlights of that trip are also too numerous to count, our day in Verona is on that list for sure.
The charming city of Verona is an easy 80-minute train ride from (equally charming) Venice, and we thought it would make a lovely day trip. Jay was thinking history, culture, architecture, photography. I — obviously! — was thinking Pandoro pans. I have been coveting genuine Italian pans for this star-shaped golden holiday bread forever, and they just can’t be found in the US. But Pandoro originated in Verona, so I was sure I could find some there.
And find them I did, but that wasn’t the best part. The best part was how I found them. I remembered that the lovely and talented Cinzia also hails from Verona, and when I emailed her to ask about where I might buy the pans, she not only came through with the name of a shop (Plurimix), but she came into the city to meet us! Over lunch and a slice of Nadalin (another Veronese holiday bread, reportedly the forerunner of Pandoro), I found Cinzia to be every bit as warm and delightful as her blog.

And that, my dear friends, is the real pleasure I derive from writing this blog: connecting with wonderful people all over the globe, whether face-to-face or through virtual pathways. I can’t think of a nicer way to observe BreadBakingDay — the monthly event that celebrates baking and breaking bread together — than with Pandoro dedicated to Cinzia (who happens to be hosting BBD this month, too!), Zorra (creator of BBD), and all of my bread-baking friends everywhere.
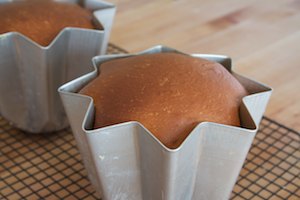
Please read my previous post on Pandoro for some notes that might be helpful in the baking of this rather involved bread. As before, my kitchen was cooler than the ideal 72F, so I didn’t have time to let the dough proof quite as much as it should have; ideally it would be to the tops of the pans when it’s put in the oven. But oven spring is a beautiful thing.
Pandoro
(Adapted from SFBI)
Yield: 1000 g (2 loaves)
Time:
- Develop the sweet starter (assuming you start with a healthy sourdough starter): every 4 hours for 2 days, at 85F
- Mix and ferment first and second doughs (approximately simultaneously): 2 hours at 85F
- Mix and ferment third dough: 3 hours at 85F
- Mix final dough: 30 minutes or more
- Ferment final dough: 2 hours
- Proof in pans: 14 – 18 hours or more at room temperature
- Bake: 35 minutes
First Dough Ingredients:
- 66 g flour
- 33 g water
- 27 g egg
- 17 g sugar
- 96 g sweet starter (instructions follow), 4 hours after last feeding
Second Dough Ingredients:
- 41 g flour
- 0.8 g (1/4 t.) osmotolerant yeast (see note above)
- 27 g egg
- 8 g sugar
Third Dough Ingredients:
- 60 g flour
- 26 g egg
- 12 g sugar
- 3 g butter, softened
- all of the first dough
- all of the second dough
Final Dough Ingredients:
- 166 g butter, softened to pliability (not melted)
- 10 g cocoa butter, finely chopped (optional, or use white chocolate)
- seeds scraped from 1/2 vanilla bean
- 219 g flour
- 5.3 g (7/8 t.) salt
- 10 g honey
- all of the third dough
- 166 g egg
- 106 g sugar
Additional Ingredients:
- melted butter, for brushing the pans
- powdered sugar for topping
Method:
- Mix all of the first dough ingredients together with your hand until they are evenly incorporated. Use a dough scraper to salvage excess dough left on your hand. Cover the dough and ferment in a warm place (about 85F) for two hours.
- Meanwhile, mix the second dough in the same manner and ferment it for 1.5 hours at 85F. Time things so the first and second doughs finish fermenting at the same time.
- When the first and second doughs are ready, mix the third dough, again by hand just until the ingredients are incorporated. Ferment it for 3 hours at 85F.
- Before mixing the final dough, beat the butter with the vanilla seeds in a stand mixer with a paddle until it is light. Add the chopped cocoa butter and stir it in briefly.
- In a stand mixer with a dough hook, combine the final dough flour, salt, honey, third dough, and half the egg. Mix on slow speed until the ingredients are incorporated, about 4 or 5 minutes. The dough will be stiff.
- Add a third of the sugar and continue mixing on slow speed until it is incorporated into the dough.
- Turn the mixer to medium speed and continue mixing for a few minutes to start to develop the gluten.
- Add about 1/4 of the remaining egg. Continue mixing in medium speed until it is completely mixed into the dough and a minute or so longer.
- Add about 1/4 of the remaining sugar and continue mixing until fully incorporated and another minute longer.
- Repeat the above two steps until all of the egg and sugar have been added.
- Continue mixing in medium speed until gluten has reached full development.
- Turn the mixer back to low speed and add the prepared butter mixture all at once. Continue on low speed until the butter is completely mixed into the dough and you can see the dough pulling away from the bottom of the bowl.
- Transfer the dough to a lightly buttered container. Cover and ferment for 2 hours, with a fold after the first hour.
- Meanwhile, brush your pans well with melted butter. Make sure you cover all the nooks and crannies of the pans.
- Turn the fermented dough onto a lightly buttered counter. Divide it into two pieces of 500 g each.
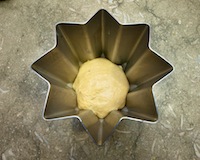
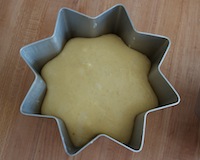
- Shape the dough into tight balls and place them, seam-side-down, into the buttered pans.
- Proof, covered, for 14 – 18 hours or more at room temperature (72F is ideal), until the top of the dough dome is at the level of the top of the pan.
- Meanwhile, preheat the oven to 325F on convection setting or 350F on regular bake. You will also need steam during the initial phase of baking, so prepare for this now.
- Bake for 5 minutes with steam, and another 30 minutes or so without steam. The loaves should be a rich golden brown and their internal temperature should be 185F.
- Cool in the pans for 30 minutes, then invert on a wire rack and cool completely.
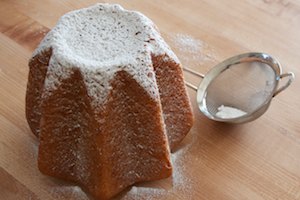
- Sift powdered sugar on the tops of the loaves before serving.
Note: These instructions assume you are starting with a vigorous “regular” sourdough starter. If you don’t have a starter yet, here’s how to start one.
- If you are starting with a stiff (50%-hydration) starter, skip to step 2. If starting with a liquid (100%-hydration) starter, convert it to 50% by combining 40 g starter with 20 g flour. Ferment for 4 hours at 85F.
- For each subsequent feeding (except the final one), discard all but 28 g starter, and add 20 g flour and 10 g water. Ferment for 4 hours at 85F. Repeat for about 2 days.
- For the final feeding (4 hours before you will use it in the first dough), combine 56 g starter, 40 g flour, and 20 g water. Ferment at 85F. You will need 96 g for the first dough.
Wow! Pandoro pans! They are beautiful! And Congratulations on your wedding again – fabulous! And wishing you and your family a very very Happy, Healthy and Prosperous 2012. Yes, things can always get better (I keep telling myself). And starting the year with a Pandoro (which I have always wanted to learn to make) is a great and sweet way to do it!
Oven-Spring, making friends, travel with your love: most beautiful things!
Truly a gorgeous Pandoro! The simplicity of the photo belies the process 🙂
Lovely Pandoro and an interesting story. I must try your Pandoro formula. Don’t have Pandora pans but do have brioche pans and I’m thinking they might be a reasonable substitute.
Thanks so much for all you do to promote baking—and charitable events. Also, congratulatons on your recent wedding and here’s wishing you and yours the happiest of new years and all good things in 2012.
Regards,
Howard
Congratulations to you and Jay! I wish you all the best on 2012 and beyond!
Happy New Year, and thank you for this wonderful site! If your Italian pans start to feel a little lonely, SFBI is now selling pandoro pans that look a lot more authentic than anything else I’ve found here in the U.S.
http://sfbi.com/pan_d_oro_pans.html
Susan, congratulations on your wedding!
Your pandoro is beautiful! I am so happy to hear that you enjoyed Venice and Verona, two beautiful places, and you were there at a good time, with fewer tourists.
To an even better 2012!
I wish you all the happiness in the world as you start your new life with your husband 🙂
How lovely! Two pretty ladies, both love making bread. Perfect!
Happy Ne Year Susan!
You promised and did!
I envy (but just a little and in positive 🙂 your excellent baking manuality, I will learn more and more for sure!
After a terrific failure years ago with Pandoro (did not rise at all or just a little in the pan) I have no more excuses to try again, and I have also 6 tiny pans for individual cakes 🙂
But I might better try during summertime, with helping warm temperatures 🙂
Thanks for participating, hope you had a great holiday time, wish you a sparkling 2012, all the best and more, bbd recap will be on-line soon, I am working at it! 🙂
I can see why you needed to have that pan! What a beautiful looking loaf.
Thank you for revealing the ingredients AND the processing techniques. I learned a great deal from your article.
Not having traditional tins, I made do with saucepans that have ovenproof handles. However, the recipe came out so well, I’m now treating myself to a star-shaped pan. (http://www.fantes.com/panettone-pandoro.html and http://browncookie.com/products/large-pandoro-panettone-mold-star-bundt-cake-pan)
Whole Foods Market sells 100% USDA Organic Raw Cocoa Butter in their body care section. The brand is Inesscents. (A company rep said the cocoa butter can be used for cooking. They just don’t label it as edible because they are not certified as a food products manufacturer.).
I just found a better price on Italian pandoro pans:
http://www.bridgekitchenware.com/browse.cfm/vintage-italian-pandoro-mold-9-cups-8-x-5.75in/4,488.html
They are tinned steel. “Vintage” just means they are no longer importing this item. Mine are in perfect condition, no rust.
I want to make this but do not have a pandora pan. Any suggestion? Can I use a normal cake pan and get good results?