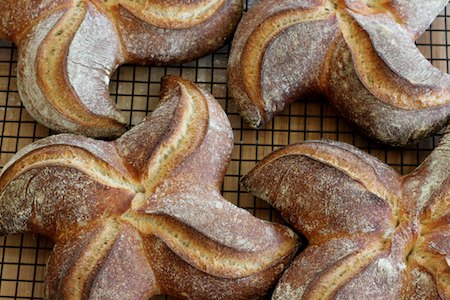
The three B’s (baguettes, batards, and boules) are classic, but maybe you want to mix up your loaf shapes now and then. Pinwheel loaves are an easy and fun change of pace. They are also good for people with fear of scoring, as no blade is required. They are not good for keeping birds away from your vegetable garden, however.
The loaves here are Norwich Sourdough, but you can use this technique with any medium-hydration dough. The shape is essentially two fendu loaves twisted in their centers and placed at right angles to each other.
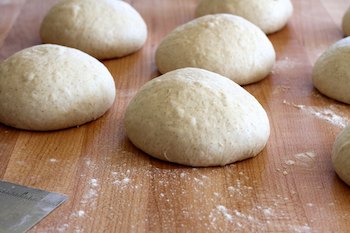
For each 500-gram loaf, divide the dough into two 250-gram pieces. Shape them into balls, cover, and let them relax for 20 minutes.
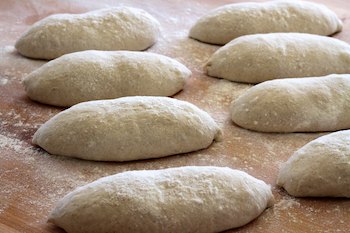
Shape the balls into batards and again let them relax for 20 minutes.
Flour the surface of the dough generously. Using a dowel or thin rolling pin, roll a 1-inch-wide “hinge” longitudinally in the center of the batard. Throw a little more flour into the gap between the halves.
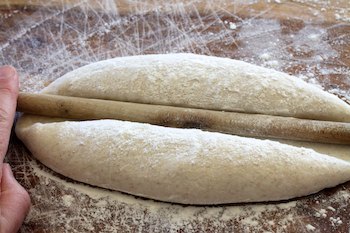
Push the halves back together. Roll another hinge, about 2 inches wide, across the dough to split it into halves in the other direction.
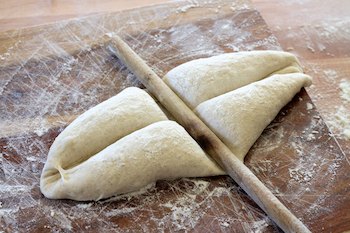
Twist the dough at the crosswise hinge so each half winds up cleft side up again.
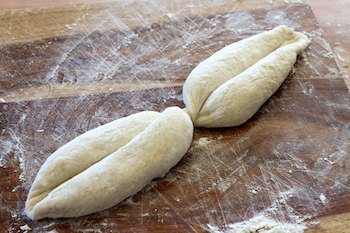
Turn the twisted fendu over and lay it (cleft side down) on a generously-floured linen. Repeat the above steps with a second batard and lay it (again cleft side down) at right angles to the first one so their centers overlap.
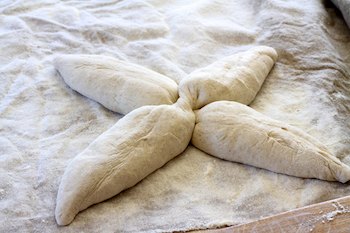
Gently curve each “blade” of the pinwheel. Cover and proof for as long as your dough calls for.
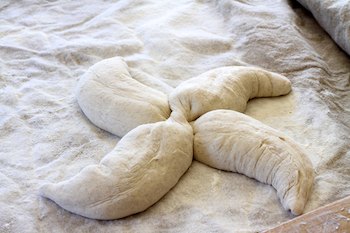
To transfer the proofed loaf to the peel, place the peel close alongside the loaf and lift the edge of the linen to flip the loaf onto the peel.
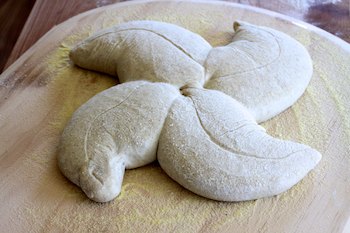
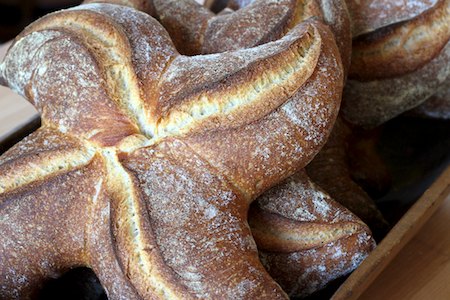
It is not necessary to score the loaf; it will open up at the clefts.
Les voilà!
Hello Susan,When we saw these beautiful pinwheels Peter asked me to try and make them too. We could only say; ‘wow, these look amazing’. With your explanation and the great photos I will give it a try soon. Thank you.
Beautiful!
These look awesome. I am scared of scoring and shaping like this will probably take years for me.
So beautiful! Do you ever try this in a smaller loaf like something in roll size?
Thank you for the nice comments!
Stefanie, I haven’t, but these would be very cute as rolls (though you’d have to use something about the size of a thin pencil to form the clefts), or even as smaller loaves where each blade could break off and become a roll itself.
fantastic!
have to do!
Wow, those are amazingly gorgeous! But then your creations always are… 🙂
A great tip, thanks! Your pinwheels are splendid!
Cheers,
Rosa
Oh these are beautiful and fun! I am going to have this as my next project!
What fun! Clever way to avoid the scoring with the cleft, but mostly a cool way to have mini loaves for 2 -4 with each pinwheel. Whee!
this is just so pretty! Never saw this before. Thanks for sharing, I’ll use this shape for sure.
Excellent – I love it! I’ve never seen this technique before, so thanks for sharing it! Stunning.
🙂
ButterYum
I love this shape, it’s beautiful. I am going to try it for sure.
Wow! These are beautiful! Thank you for the step by step tutorial…I can’t wait to give these a go!
Wonderful! Not sure if it’s appropriate to use for bread but breathtaking (and do-able!). Thanks Susan
Hi! I’m having a linky party called A Themed Baker’s Sunday where this weeks theme is bread! I would love for you to join! Hope to see you there!
http://cupcakeapothecary.blogspot.com/2011/05/themed-bakers-sunday-4.html
Alyssa
Fabulous breads Susan! I firmly believe SFBI does a baker good! I always look to your site for a bread pick-me-up, you never fail me. Also, do you have any words of wisdom for a baker looking to build a wood-fired oven? I have ideas and have visited a few but I want to make it good. There are quite a few designs,sizes etc.
Gorgeous! Your breads are always just stunning… Any plans to host another class? I’m still hoping to learn from you someday 🙂
Beautiful wheels.
I’ll have to give these a go. Thanks for the step by step.
I tried to guess how it was done before scrolling down to look at the instruction and couldn’t figure it out. How clever! Very decorative and unusual shape makes pinwheel bread a perfect table centrepiece.
So neat!
He publicado tu entrada en Mis FAvoritos de esta semana, puedes verla aquí (algunos ya la habeis visto…)
http://blocderecetas.blogspot.com/2011/06/mis-favoritas-semana-242011.html
Muchas gracias
I love this shape! So often I find myself stuck in a shaping rut when I can’t think of anything new. Can’t wait to try this out.
so perfect! a crust that is throat!
Just wonderful!
Such a great shape and so nicely explained. Thank you for your great post. ^_^
Just loved this idea. Although not for baguettes, I used this trick for my honey croissants and it came out absolutely the way the French make it. Instead of 4 parts, I just used lesser dough and divided the loaf into two before baking. I am going to ignore all methods that I have tried so far (including the one my aunt taught me) and go with this. Thank you so much, dear.
So this is a clear that shaping a pinwheel are the best.
Great pictures and detailed instructions. Thanks for sharing! I am looking forward to trying these.